Common Travel Document Mistakes to Avoid Before an International Trip
Many international travel problems begin before the traveler reaches the airport. A passport can still look ↗ valid but fail a destination’s validity rule. A visa can be approved for the wrong dates. A flight connection can create a transit requirement. Even a small difference between a ticket name and passport can lead to extra work.
I prefer checking travel documents as a complete set rather than looking at the passport, visa, and flight booking separately. The U.S. Department of State recommends checking passport validity early, confirming visa requirements, organizing required travel documents, and reviewing destination-specific entry and exit rules before international travel.
This guide covers the most common travel document mistakes to avoid before an international trip. It focuses on errors that can affect check-in, boarding, transit, immigration, car rental, or the ability to continue the trip.
Entry and document rules vary by destination and can change. Check current requirements through the destination government, embassy or consulate, and the U.S. Department of State before departure.
Key Takeaways
- ✓Do not judge passport validity only by whether it expires after your return date.
- ✓Check visa, eVisa, and electronic travel authorization requirements for your exact passport and travel purpose.
- ✓Review transit-country rules as carefully as final-destination rules.
- ✓Make sure the name on flight bookings matches the passport you will use.
- ✓Check that passport numbers and dates entered on electronic applications are correct.
- ✓Children can have separate passport and consent-document rules.
- ✓Keep original travel documents in your carry-on rather than checked luggage.
- ✓Create secure backups before leaving home.
- ✓Check health and driving documents where they apply.
- ✓Review all document requirements again shortly before departure.
Mistake 1: Checking Only the Passport Expiration Date
One of the most common mistakes is thinking:
My passport expires after I return home, so it is valid for my trip.
That may not be enough.
Some countries require a passport to remain valid for a set period beyond your trip.
The State Department tells U.S. travelers to check passport expiration early because some destinations require months of remaining validity beyond the travel dates.
For example, current State Department guidance for Switzerland says a passport should remain valid for at least three months beyond the planned Schengen stay.
The exact rule varies by destination.
Better Approach
Check:
- ✓Passport expiration date
- ✓Required validity after entry
- ✓Required validity after departure
- ✓Your final travel date
- ✓Transit-country requirements
Do not use a general six-month passport rule as if every country follows it.
Check the specific country.
Mistake 2: Waiting Too Long to Renew a Passport
A traveler may discover that a passport does not meet the destination’s validity rule only a few weeks before departure.
That creates unnecessary pressure.
The State Department recommends checking passport expiration as soon as you begin planning and applying early if you need a new passport.
Waiting can affect more than the passport itself.
A replacement passport can have a new passport number, which may affect:
- ✓Visa applications
- ✓eVisas
- ✓Electronic travel authorizations
- ✓Airline booking information
- ✓Trusted traveler records
- ✓Other documents linked to the old passport
Better Approach
Check the passport before applying for visas or other passport-linked travel permissions.
If renewal is likely, completing it earlier can reduce the number of records that later need updating.
Mistake 3: Forgetting That Children’s Passports Expire Sooner
Parents sometimes assume a child’s U.S. passport has the same validity period as an adult passport.
It does not always.
Current State Department guidance says U.S. passports issued to children under age 16 are valid for five years.
A child who traveled internationally a few years ago may therefore need a new passport even while the parents’ passports remain valid.
Better Approach
Check each family member’s passport separately.
Do not look only at the adults’ expiration dates.
For every traveler, confirm:
- ✓Passport expiration
- ✓Destination validity requirement
- ✓Blank-page requirement where applicable
- ✓Visa requirement
- ✓Travel authorization requirement
Treat each child as an individual international traveler with their own document requirements.
Mistake 4: Assuming a Valid Passport Is the Only Entry Document You Need

A passport proves identity and nationality, but it does not automatically give permission to enter every country.
Depending on the destination and trip, you may also need:
- ✓Visa
- ✓eVisa
- ✓Electronic Travel Authorization
- ✓Arrival registration
- ✓Health document
- ✓Proof of onward travel
- ✓Supporting immigration documents
The State Department directs U.S. travelers to destination-specific information covering passport, visa, vaccination, and other entry conditions.
Better Approach
Ask:
What documents does someone traveling on my passport need for this exact trip?
Your friend may have a different passport and therefore different entry requirements.
Never copy another traveler’s document plan without checking your own eligibility.
Mistake 5: Confusing Visa-Free Travel With Document-Free Travel
Visa-free entry does not mean:
passport + flight ticket = guaranteed entry.
A visa exemption only removes the need for a traditional visa under certain conditions.
A destination may still require:
- ✓Electronic travel authorization
- ✓Valid passport
- ✓Return or onward ticket
- ✓Accommodation information
- ✓Proof of funds
- ✓Arrival form
- ✓Health documentation
Travelers should check the full entry rule rather than stopping when they see the words visa-free.
Better Approach
Separate these questions:
- ✓Do I need a visa?
- ✓Do I need an electronic authorization?
- ✓What passport conditions apply?
- ✓What supporting documents can be requested?
- ✓How long may I stay?
- ✓What travel purpose is permitted?
That gives you a more accurate picture of entry requirements.
Mistake 6: Applying for the Wrong Visa Type
Having a visa is not enough if it does not match the purpose of the trip.
Travel purposes can include:
- ✓Tourism
- ✓Business
- ✓Study
- ✓Work
- ✓Transit
- ✓Family visit
- ✓Other regulated activities
A traveler entering under tourist permission should not assume that the same permission automatically allows employment or another activity outside its conditions.
The State Department’s U.S. visa guidance shows the same general principle from the U.S. side: different travel purposes use different visa categories.
Better Approach
Before applying, confirm:
- ✓Purpose of trip
- ✓Visa category
- ✓Allowed activities
- ✓Number of entries
- ✓Validity dates
- ✓Maximum permitted stay
Do not choose a visa simply because it is cheaper, faster, or easier to obtain.
Mistake 7: Mixing Up Visa Validity and Allowed Length of Stay
These two dates can mean different things.
A visa might be valid for several months or years while each visit is limited to a much shorter period.
Travelers sometimes see the visa expiration date and assume they can remain in the country until that date.
That can be wrong.
Better Approach
Check separately:
Visa validity: when the visa can be used according to its conditions.
Entry window: when you are allowed to enter.
Permitted stay: how long you may remain after entry.
Number of entries: how many times the visa can be used.
Do not build your itinerary from the visa expiration date alone.
Mistake 8: Entering the Wrong Passport Number on a Visa or Authorization
Electronic applications often ask for:
- ✓Passport number
- ✓Issue date
- ✓Expiration date
- ✓Nationality
- ✓Date of birth
- ✓Full name
One typing error can connect the approval to incorrect passport information.
This matters because many eVisas and electronic authorizations are linked directly to the passport used in the application.
Better Approach
Before submitting any application:
- ✓Put the passport beside you.
- ✓Copy details directly from it.
- ✓Check every number.
- ✓Review the spelling of your name.
- ✓Check issue and expiration dates.
- ✓Confirm nationality.
- ✓Review the form once more before payment.
Do not fill passport details from memory.
Mistake 9: Renewing Your Passport After Getting an eVisa or ETA Without Checking It Again
A new passport usually means a new passport number.
If your eVisa or travel authorization was linked to the old passport, you may need to update it or apply again depending on the destination’s rules.
Do not assume the approval automatically moves to the new passport.
Better Approach
After receiving a new passport, review every document tied to the old one:
- ✓Visa
- ✓eVisa
- ✓ETA
- ✓ESTA or similar authorization
- ✓Airline profile
- ✓Travel booking
- ✓Trusted traveler program
- ✓Car rental booking where passport information was supplied
Check the issuing government’s instructions for updating or replacing the authorization.
Mistake 10: Ignoring Transit-Country Requirements
This is one of the easiest mistakes to make on a multi-flight itinerary.
Travelers often check:
Do I meet the rules for my destination?
but forget:
What rules apply during my connection?
A transit country may have separate rules depending on:
- ✓Your passport
- ✓Airport
- ✓Terminal change
- ✓Length of connection
- ✓Whether you leave the secure international area
- ✓Whether you collect checked baggage
- ✓Whether you change airports
Transit visas also exist as a separate immigration category. For example, the United States has a specific C transit visa category for certain foreign travelers passing through the country.
Better Approach
Check every country shown on the itinerary.
For each connection, ask:
- ✓Do I remain airside?
- ✓Do I pass through immigration?
- ✓Do I collect and recheck baggage?
- ✓Do I change terminals?
- ✓Do I change airports?
- ✓Does my passport require a transit visa?
Do this before buying a difficult-to-change ticket.
Mistake 11: Assuming a Short Layover Cannot Affect Your Documents
A two-hour connection can still matter.
The length of the layover is not the only factor.
What matters is what the airport and country’s immigration system require you to do.
A short connection may still involve immigration if you:
- ✓Need to collect luggage
- ✓Have separate tickets
- ✓Change airports
- ✓Enter the country before the next flight
- ✓Use a route that does not support airside transit
Better Approach
Research the airport transfer process, not just the visa rule.
Your airline can explain baggage and terminal procedures, while the destination or transit government should be used for immigration requirements.
Mistake 12: Booking Separate Tickets Without Checking Immigration Consequences
Separate-ticket itineraries can create hidden document problems.
Imagine:
Flight 1: New York → Country B
Flight 2: Country B → Country C
If the bookings are separate, you may have to:
- ✓Enter Country B
- ✓Collect luggage
- ✓Pass customs
- ✓Recheck bags
- ✓Pass security again
That can turn a simple connection into an actual entry.
If your passport requires a visa to enter Country B, this matters.
Better Approach
Before buying separate tickets, check:
- ✓Baggage transfer
- ✓Immigration process
- ✓Transit visa
- ✓Entry visa
- ✓Connection time
- ✓Terminal or airport change
A cheap flight can become expensive if the connection cannot legally be completed.
Mistake 13: Not Matching the Flight Booking Name to the Passport

Airline bookings should use the name shown on the travel document you plan to present.
Problems can happen because of:
- ✓Nickname
- ✓Misspelled surname
- ✓Missing part of the name
- ✓Married vs previous surname
- ✓Booking made before legal name change
- ✓Incorrect order or format entered into the reservation
Small formatting differences are not always the same as a true name mismatch, and airline systems can display names in unusual ways.
But a genuine mismatch should be checked before travel.
Better Approach
When booking, have the passport open.
Enter the traveler’s name from the passport rather than from memory.
Then review the confirmation immediately.
If something is wrong, contact the airline while there is still time to correct it.
Mistake 14: Forgetting to Check Names Across All Travel Documents
The airline ticket is not the only place where names matter.
Compare the name across:
- ✓Passport
- ✓Visa
- ✓eVisa
- ✓ETA
- ✓Flight booking
- ✓Vaccination certificate where required
- ✓International Driving Permit
- ✓Child documents
This becomes especially useful after:
- ✓Marriage
- ✓Divorce
- ✓Legal name change
- ✓Passport replacement
Do not assume every system automatically updates because one government document changed.
Mistake 15: Ignoring Blank Passport Page Requirements
Expiration is not the only passport condition.
Some destinations may expect available passport pages for visas or entry and exit stamps.
The State Department advises travelers to use its destination information to check whether sufficient blank passport pages are required.
Better Approach
Before travel:
- ✓Look through the passport.
- ✓Check how many usable blank pages remain.
- ✓Review the destination’s current requirement.
- ✓Consider later countries on a multi-country itinerary.
A passport with years of validity remaining can still create a problem if it cannot meet the destination’s page requirement.
Mistake 16: Traveling with a Damaged Passport Without Checking It
A passport is an official identity document.
Significant damage can create problems with:
- ✓Machine reading
- ✓Identity verification
- ✓Passport photographs
- ✓Visa pages
- ✓Border inspection
Do not assume a damaged passport is fine simply because your name is still visible.
Better Approach
Inspect the passport before booking international travel.
Look for:
- ✓Water damage
- ✓Torn pages
- ✓Missing pages
- ✓Major cover damage
- ✓Damaged identity page
- ✓Altered information
- ✓Problems with the electronic passport area
If the damage is more than normal wear, check with the passport authority before traveling.
Mistake 17: Forgetting Child Consent and Family Documents
Children can create additional document requirements beyond having a passport.
The State Department says the United States itself does not require evidence of both parents’ permission for a child to travel internationally, but some countries do. It recommends bringing evidence of the relationship to the child and checking destination-specific requirements.
Requirements can be especially relevant when a child travels:
- ✓With one parent
- ✓With grandparents
- ✓With another relative
- ✓With a school group
- ✓With an unrelated adult
- ✓Alone
Some destinations can be strict. Current State Department information for Botswana, for example, describes notarized consent requirements in certain situations involving minors.
Better Approach
For each child, check:
- ✓Passport
- ✓Visa
- ✓Birth certificate requirement
- ✓Parental consent requirement
- ✓Custody documents where relevant
- ✓Health documents
- ✓Airline rules for minors
Do not wait until airport check-in to ask whether a consent letter was needed.
Mistake 18: Assuming Family Members Have the Same Entry Requirements
Families travel together, but their documents may differ.
Differences can come from:
- ✓Passport nationality
- ✓Dual citizenship
- ✓Age
- ✓Visa status
- ✓Residency
- ✓Previous travel history
A parent may qualify for an electronic authorization while a child needs a separate application.
Every family member should be checked individually.
Better Approach
Create a simple document row for each traveler:
| Traveler | Passport | Visa/Authorization | Health Docs | Child Docs |
|---|---|---|---|---|
| Adult 1 | Check | Check | Check | — |
| Adult 2 | Check | Check | Check | — |
| Child 1 | Check | Check | Check | Check |
| Child 2 | Check | Check | Check | Check |
This catches missing documents much faster than one family checklist with a single tick beside “passport.”
Mistake 19: Keeping Required Documents in Checked Luggage
Your most valuable travel documents should stay with you during international travel.
That includes documents you may need before collecting checked baggage.
Examples can include:
- ✓Passport
- ✓Visa papers
- ✓Required vaccination certificate
- ✓Child consent documents
- ✓Driver’s license
- ✓IDP where needed
- ✓Key medical documents
Checked baggage can be delayed or lost.
You also normally pass through immigration before getting access to it.
Better Approach
Create one secure border document folder inside your personal item or carry-on.
Keep it in a fixed location.
Do not move the passport between your suitcase, jacket, backpack, and handbag throughout the airport.
Mistake 20: Traveling Without Document Backups

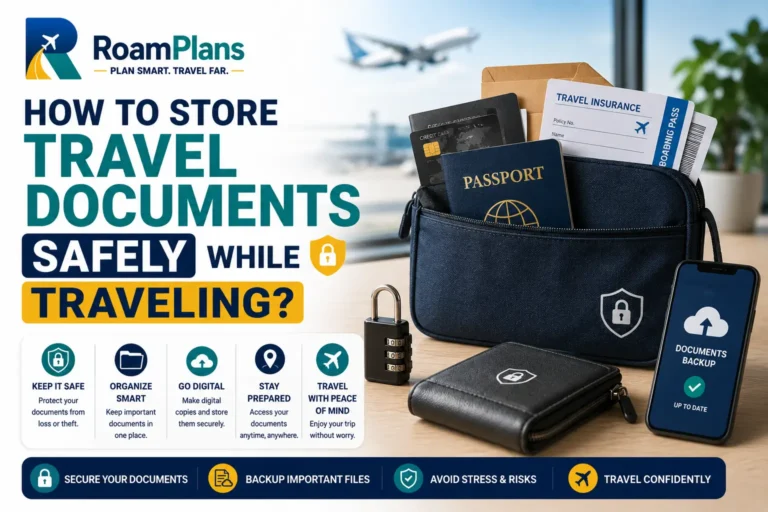
A photocopy does not replace a passport, but backups can make an emergency easier to handle.
The State Department’s international travel checklist recommends making copies of required travel documents, keeping a set separately from the originals, giving another set to someone trusted, and keeping photos of key documents.
Useful backups can include:
- ✓Passport identity page
- ✓Visa
- ✓eVisa
- ✓Insurance
- ✓Vaccination certificate
- ✓Driver’s license
- ✓IDP
- ✓Child documents
- ✓Emergency contacts
Better Approach
Use three layers for your hardest-to-replace documents:
Original
Separate backup
Secure digital copy
If one bag disappears, you should still have access to the information needed to start fixing the problem.
The Best Time to Find a Travel Document Mistake
The best time is before the booking becomes difficult to change.
I would use this order:
Passport → destination rules → visa/authorization → transit rules → flight booking → health documents → driving documents → backups
This catches problems early.
Checking everything for the first time the night before departure gives you very few options if something is wrong.
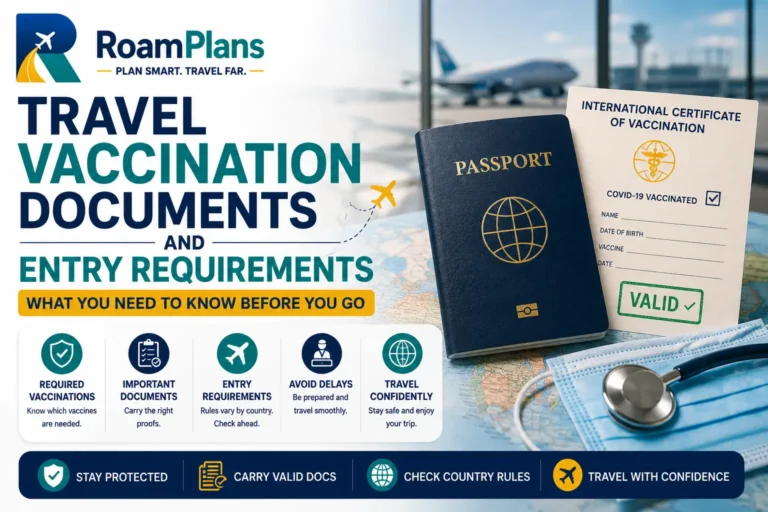
Mistake 21: Forgetting Vaccination and Health Entry Documents
A passport and visa may be correct while a health-document requirement is still missing.
Depending on the destination and route, travelers may need documents such as:
- ✓International Certificate of Vaccination or Prophylaxis
- ✓Yellow fever certificate
- ✓Polio vaccination proof
- ✓Medical waiver
- ✓Event-specific health certificate
Health recommendations and border requirements are different. A vaccine can be recommended for personal protection without being required for entry.
Better Approach
Check:
- ✓CDC destination guidance
- ✓Destination government’s health rules
- ✓Transit-country requirements
- ✓Special requirements linked to your type of trip
Then keep any required original certificate in your carry-on with your other border documents.
Mistake 22: Checking Health Rules for the Destination but Not the Route
Vaccination-document rules can sometimes depend on where you have recently traveled, rather than only where your trip began.
For example, yellow fever documentation can become relevant after travel through certain risk countries.
A transit stop can also matter under some destination rules.
Better Approach
Review your entire route:
Departure → connection 1 → connection 2 → destination
Also consider countries visited shortly before the trip.
Do this before deciding whether a health certificate is required.
Mistake 23: Getting a Required Vaccine Too Close to Departure
Receiving the vaccine does not always mean the related travel certificate becomes valid immediately.
Yellow fever is a good example. The certificate for a first yellow fever vaccination becomes valid for international purposes 10 days after vaccination under current rules.
If your destination requires valid proof, getting vaccinated shortly before arrival can therefore be too late.
Better Approach
Check health requirements several weeks before departure.
Leave enough time for:
- ✓Medical appointment
- ✓Vaccine availability
- ✓Required waiting period
- ✓Certificate completion
- ✓Medical waiver where applicable
Do not make border-document timing a last-minute task.
Mistake 24: Assuming an Old Yellow Fever Certificate Has Expired
Older travel advice often says a yellow fever certificate lasts only 10 years.
That is outdated.
Under current international rules, a properly completed yellow fever certificate has lifetime validity. Travelers should not assume another vaccination is needed simply because 10 years have passed.
Better Approach
Keep the original certificate safe, even if it is old.
If you have questions about whether another vaccine dose is medically appropriate for your situation, discuss that with a qualified healthcare professional rather than relying on the former certificate rule.
Mistake 25: Carrying Prescription Medicine Without Checking Destination Rules
A medicine that is legal and routinely prescribed in the United States can be restricted or illegal in another country.
The State Department advises travelers to check destination rules, keep medicine in its original labeled packaging, carry prescription copies, and consider a doctor’s letter listing medicines by their generic names.
This can be especially relevant for controlled medicines.
Better Approach
Before departure, check:
- ✓Whether the medicine is legal
- ✓Quantity limits
- ✓Permit requirements
- ✓Prescription requirements
- ✓Whether a doctor letter is advised
- ✓Transit-country rules
Keep required medication documents with the medicine.
Mistake 26: Putting Prescription Medicine and Its Documents in Checked Baggage
Checked luggage can be delayed or lost.
If that bag contains both your medication and every document explaining it, you can face two problems at once.
State Department guidance advises travelers to carry medications in original labeled containers and keep them accessible rather than relying on checked luggage.
Better Approach
Where airline and security rules permit, keep essential medication in your carry-on together with:
- ✓Prescription copy
- ✓Doctor letter where needed
- ✓Medicine permit where required
- ✓Relevant medical information
Also carry enough for reasonable travel delays when your healthcare professional and destination rules allow.
Mistake 27: Assuming Travel Insurance Is an Entry Document
Travel insurance can be valuable, but it does not replace:
- ✓Passport
- ✓Visa
- ✓Vaccination certificate
- ✓Driving permit
- ✓Immigration documents
Some destinations or visa categories may also require proof of insurance, so the policy itself can sometimes become part of the document set.
The State Department advises travelers to review whether a policy covers the countries being visited, trip length, medical care, medical transportation, and planned activities.
Better Approach
Keep your insurance certificate and emergency-assistance information available, but treat insurance as a separate document category.
Check whether your destination or visa requires a particular level or type of coverage.
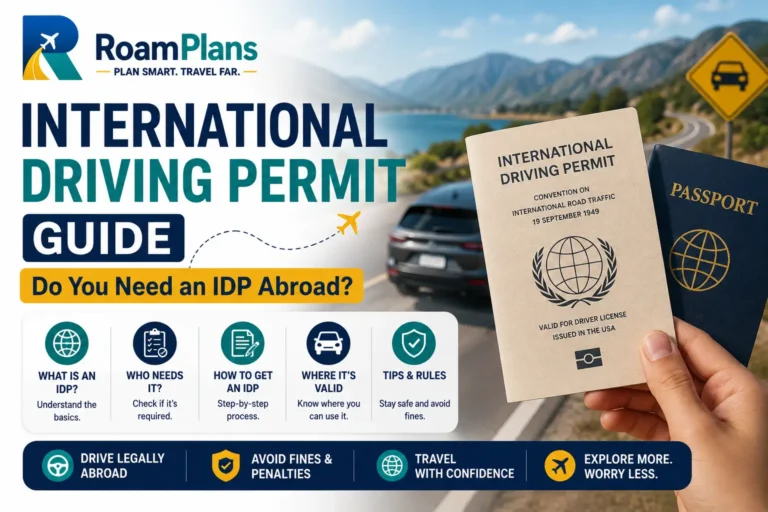
Mistake 28: Forgetting the International Driving Permit
If you plan to drive abroad, your normal driver’s license may not be enough.
Requirements differ by destination.
USA Gov currently says some countries require an International Driving Permit and identifies AAA and AATA as the two organizations authorized by the U.S. Department of State to issue U.S. IDPs.
Better Approach
Before renting a vehicle, check:
- ✓Destination driving law
- ✓Whether your U.S. license is accepted
- ✓Whether an IDP is required
- ✓Rental-company requirements
- ✓Every country on a multi-country driving route
Remember that the IDP accompanies your domestic license rather than replacing it.
Mistake 29: Checking the IDP Rule but Forgetting the Rental Company’s Rule
Legal permission to drive and rental eligibility are separate questions.
A country may accept your license, while a rental company may still have its own document requirements.
Better Approach
Check both:
Government driving requirement
and
Rental contract requirement
before booking.
Also confirm:
- ✓Minimum age
- ✓Driver’s-license holding period
- ✓Additional-driver documents
- ✓Credit-card requirements
- ✓Insurance
- ✓Cross-border permission
This avoids arriving at the counter with the wrong documents.
Mistake 30: Using an Unofficial Passport, Visa, ESTA, or IDP Website
Travel-document searches attract copycat sites.
Some look similar to government websites and charge unnecessary fees. Others may collect sensitive personal information.
The FTC warns that fake passport-service websites can appear in search results and advises U.S. travelers to go directly to the State Department for passport services.
The FTC issued a similar warning in 2026 about copycat ESTA websites that can overcharge travelers or fail to submit their application correctly.
Better Approach
Before entering passport or payment information:
- ✓Confirm who runs the website.
- ✓Start from the relevant government website.
- ✓Check the web address carefully.
- ✓Avoid assuming the first search result is official.
- ✓Be cautious if a site promises guaranteed approval.
The same care applies to IDPs. USA Gov directs U.S. applicants to AAA or AATA.
Mistake 31: Paying a Third Party for a Free Government Form
Private travel services sometimes charge for help completing forms that travelers can access themselves.
That does not automatically make every third-party service fraudulent, but travelers should understand what they are paying for.
The FTC notes that official U.S. passport application forms themselves are free and warns about sites charging travelers for forms available through the government.
Better Approach
Before paying, ask:
Is this the government fee, or am I paying a private company for assistance?
If you choose a third-party service, know exactly what service it provides.
Mistake 32: Trusting a Screenshot as the Only Copy
Screenshots are convenient but weak as your entire document strategy.
Problems can include:
- ✓Dead phone
- ✓Lost phone
- ✓Broken screen
- ✓Low battery
- ✓File accidentally deleted
- ✓Border authority requiring an original
- ✓QR code needing a current digital record
Better Approach
For key documents, use more than one format where practical:
Original document + secure digital backup + printed copy where useful
Do not assume a screenshot can replace an original passport, IDP, or official vaccination certificate.
Mistake 33: Keeping Every Digital Document Online Only
Cloud storage is useful until you arrive somewhere without:
- ✓Mobile service
- ✓Airport Wi-Fi
- ✓Roaming
- ✓Account access
A hotel address that exists only inside an online booking account is less useful when you are standing at immigration without internet.
Better Approach
Make essential files available offline before departure.
Useful offline documents include:
- ✓Visa or eVisa
- ✓First accommodation address
- ✓Flight itinerary
- ✓Insurance certificate
- ✓Emergency contacts
- ✓Passport backup copy
Keep the cloud version as another backup.
Mistake 34: Printing Documents but Never Checking Them
A printed document is not automatically useful.
Travelers can accidentally print:
- ✓Old visa approval
- ✓Wrong passenger’s document
- ✓Incomplete page
- ✓Cropped QR code
- ✓Canceled booking
- ✓Previous insurance policy
Better Approach
Before placing anything in your travel folder, check:
- ✓Traveler name
- ✓Passport number where shown
- ✓Travel dates
- ✓Validity
- ✓Booking status
- ✓Full QR or barcode
- ✓All required pages
Throw away outdated versions so they cannot be confused with the current document.
Mistake 35: Using Old Saved Entry Information
Travel rules change.
A screenshot saved during initial trip planning may no longer reflect the requirement on departure day.
The State Department tells travelers to check foreign embassy information and destination-specific entry guidance for current visa and electronic travel authorization requirements.
Better Approach
Use old notes for planning, but verify them against current official sources before travel.
A useful pattern is:
Initial check → booking check → final check
The final check should happen close enough to departure to catch recent changes.
Mistake 36: Depending Only on a Travel Blog or Social Media Post
Travel websites, forums, videos, and social posts can explain what another traveler experienced.
They should not be your final authority for an entry rule.
Someone may have:
- ✓Different nationality
- ✓Different passport
- ✓Different visa
- ✓Different transit route
- ✓Different date of travel
Better Approach
Use personal travel content to understand the process.
Use official sources to confirm the requirement.
For U.S. travelers, the State Department’s International Travel Checklist directs travelers to destination-specific information and foreign embassies for current entry requirements.
Mistake 37: Checking a Multi-Country Trip as If It Were One Destination
A trip through four countries creates four sets of possible entry rules.
For example:
United States → Country A → Country B → Country C → United States
You may need to check:
- ✓Country A entry
- ✓Country B entry
- ✓Country C entry
- ✓Transit requirements
- ✓Health rules
- ✓Passport validity
- ✓Visa rules
- ✓Driving requirements
The rules for Country A do not automatically continue into Country B.
Better Approach
Create a separate document check for each country.
| Check | Country A | Country B | Country C |
|---|---|---|---|
| Passport validity | ✓ | ✓ | ✓ |
| Visa/authorization | ✓ | ✓ | ✓ |
| Transit rule | ✓ | ✓ | ✓ |
| Health document | ✓ | ✓ | ✓ |
| Driving document | ✓ | ✓ | ✓ |
Do the same for the return route.
Mistake 38: Forgetting That Changing the Route Can Change the Documents
You may research one itinerary and later book another.
For example:
Original route:
New York → Paris
Changed route:
New York → London → Paris
The new connection introduces another country.
That can affect:
- ✓Transit permission
- ✓Electronic authorization
- ✓Immigration process
- ✓Baggage collection
- ✓Health requirements
Better Approach
Any time you change the route, recheck the travel documents.
Do not reuse the document checklist from the old itinerary without reviewing the new connection.
Mistake 39: Assuming Everyone in Your Group Needs the Same Documents
Two travelers on the same flight can have different requirements because they hold different passports.
This is common with:
- ✓Couples with different nationalities
- ✓Dual-national families
- ✓International groups
- ✓Children with different citizenship
- ✓Residents traveling on foreign passports
Better Approach
Build the checklist by traveler, not only by destination.
For example:
| Requirement | Traveler 1 | Traveler 2 |
|---|---|---|
| Passport | Check | Check |
| Visa | Check | Check |
| ETA/eVisa | Check | Check |
| Transit visa | Check | Check |
| Health proof | Check | Check |
Never assume one person’s visa-free status covers the entire group.
Mistake 40: Forgetting Which Passport You Used for an Application
Dual citizens may hold more than one passport.
That can create confusion if:
- ✓Visa was issued against Passport A
- ✓Flight profile contains Passport B
- ✓Electronic authorization is linked to Passport A
- ✓Traveler presents Passport B at check-in
Better Approach
Know which passport is linked to each authorization.
If your trip requires you to carry or use more than one passport, keep a clear record of:
- ✓Which passport was used for the visa
- ✓Which passport was used for the authorization
- ✓Which passport information is on the airline booking
- ✓Which passport is required when entering or leaving each country
Do not swap travel documents casually during check-in.
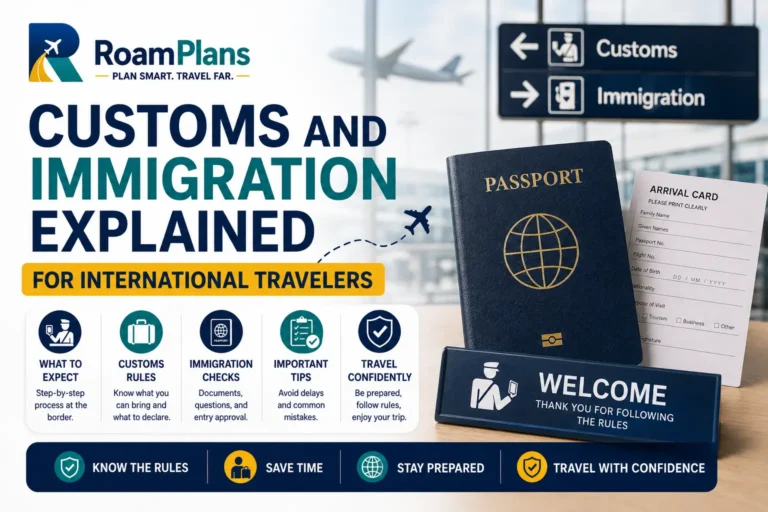
Mistake 41: Forgetting Arrival Forms and Pre-Travel Registrations
Some destinations use separate online arrival, immigration, customs, or health forms.
These may be different from a visa or ETA.
A traveler can therefore have:
valid passport + valid visa + missing arrival registration
Better Approach
In the days before travel, check whether your destination requires:
- ✓Arrival form
- ✓Customs declaration
- ✓Health form
- ✓Immigration registration
- ✓QR code
- ✓Pre-arrival submission
Check the allowed submission window as well.
Some systems cannot be completed months in advance.
Mistake 42: Filling Out Arrival Forms With Guessed Information
Travelers sometimes rush through a form and guess:
- ✓Hotel address
- ✓Flight number
- ✓Passport number
- ✓Length of stay
That can create mismatches with the rest of the trip.
Better Approach
Have these items ready before completing the form:
- ✓Passport
- ✓Flight booking
- ✓Accommodation confirmation
- ✓Return date
- ✓Contact details
Copy the information accurately.
Mistake 43: Forgetting Proof of Onward or Return Travel
A one-way flight does not automatically mean you will be refused entry, but some destinations or entry categories may require travelers to show that they plan to leave within the permitted stay.
Better Approach
Check whether your entry conditions call for:
- ✓Return ticket
- ✓Onward ticket
- ✓Proof of onward travel
If required, keep the booking available offline.
Do not assume an immigration officer will accept a verbal explanation instead of documentation when proof is part of the rule.
Mistake 44: Forgetting Accommodation Information
Border forms or immigration officers may ask where you are staying.
Travelers sometimes know the hotel name but cannot find:
- ✓Address
- ✓Telephone number
- ✓Reservation
- ✓Host details
because everything is buried inside an online booking account.
Better Approach
Save the first accommodation address offline.
For a private stay, keep the host information required by the destination’s entry process.
You do not need to print every hotel reservation unless the trip requires it.
Mistake 45: Assuming Travel Insurance Covers Every Country and Activity
Buying insurance is not the same as checking the policy.
Coverage can depend on:
- ✓Country
- ✓Trip duration
- ✓Medical conditions
- ✓Activities
- ✓Policy exclusions
The State Department recommends checking whether travel insurance applies to all countries on your trip, covers the full trip length, and includes relevant medical and evacuation benefits.
Better Approach
Before departure, confirm:
- ✓Destination coverage
- ✓Dates
- ✓Emergency number
- ✓Medical coverage
- ✓Planned activities
- ✓Exclusions
Save the policy number offline.
Mistake 46: Forgetting to Check Document Expiration Dates Together
Travel documents can expire at different times.
You might have:
- ✓Passport valid
- ✓Driver’s license expired
- ✓IDP still showing dates
- ✓Insurance ending before the final day
- ✓Visa valid for a different period
Checking each document months apart makes these mismatches easier to miss.
Better Approach
Create one final date check:
| Document | Valid From | Valid Until | Covers Full Trip? |
|---|---|---|---|
| Passport | — | Date | Check |
| Visa | Date | Date | Check |
| ETA/eVisa | Date | Date | Check |
| Driver’s license | — | Date | Check |
| IDP | Date | Date | Check |
| Insurance | Date | Date | Check |
This gives you one view of the whole trip.
Mistake 47: Keeping Every Original in One Document Wallet
A well-organized wallet can still create a security problem.
If it holds:
- ✓Passport
- ✓Driver’s license
- ✓IDP
- ✓Backup card
- ✓Passport photocopy
- ✓Insurance
- ✓All cash
one stolen wallet removes both the originals and backups.
The State Department recommends making copies of key travel documents and keeping copies separately from the originals.
Better Approach
Use separate storage.
For example:
Main travel wallet
- ✓Passport
- ✓Required entry documents
Separate secure location
- ✓Paper passport copy
- ✓Backup payment method
Secure digital storage
- ✓Document scans
Mistake 48: Forgetting to Download Documents Before Leaving Home
Do not wait until the airport to discover that your:
- ✓eVisa PDF
- ✓Insurance certificate
- ✓Hotel booking
- ✓Vaccination record
exists only inside an account you cannot open.
Better Approach
The day before departure:
- ✓Open each essential file.
- ✓Download it.
- ✓Check that it works offline.
- ✓Use clear filenames.
- ✓Keep backups where appropriate.
Put the phone into airplane mode and test your travel folder.
If you can still open the essential documents, your offline setup works.
Mistake 49: Making Major Document Changes Right Before Departure
Last-minute changes can affect several linked records.
Examples include:
- ✓New passport
- ✓Legal name change
- ✓New flight route
- ✓Different transit country
- ✓Added child traveler
- ✓Added driving segment
Each change can trigger another document check.
Better Approach
Whenever a major trip detail changes, ask:
Which travel documents are linked to this change?
Then review them before continuing.
A new passport may affect an eVisa.
A new route may create a transit requirement.
A new rental-car plan may create an IDP requirement.
Mistake 50: Doing the Final Document Check at the Airport
The airport should be the place where you use your documents, not the place where you first confirm whether you have them.
By then, fixing a missing visa, expired passport, wrong health certificate, or transit problem may be impossible.
The State Department recommends checking passport, visa, medication, child-travel, and driving requirements as part of pre-trip preparation rather than leaving these issues to departure day.
Better Approach
Do your final document review at home.
Check:
- ✓Passport
- ✓Visa/eVisa/ETA
- ✓Transit documents
- ✓Health certificate
- ✓Child documents
- ✓Driving documents
- ✓Insurance
- ✓Prescriptions
- ✓Arrival forms
- ✓Backups
Then place the originals you need at the border in one secure carry-on location.
A Better Final Check: Think Like the Whole Trip
Instead of asking:
Do I have my passport?
ask:
Can I complete every stage of this trip with the documents I have?
Work through the route:
Airline check-in → departure → transit → arrival immigration → customs → hotel → driving → next country → return home
For each stage, ask what document could be requested.
That catches mistakes a simple packing list can miss.
The goal is not to carry every paper you own.
It is to make sure the right traveler has the right valid document at the point where it may actually be needed.
Do a 7-Day Travel Document Check
About one week before departure, stop making assumptions and review the whole trip again.
By this point, you should already have most documents ready. The goal is to catch anything that changed after booking.
Check:
- ✓Passport validity
- ✓Visa or eVisa
- ✓ETA or other travel authorization
- ✓Transit-country rules
- ✓Vaccination or health documents
- ✓Child travel documents
- ✓Driver’s license and IDP where needed
- ✓Travel insurance
- ✓Prescription documents
- ✓Arrival or customs forms that can already be completed
Also compare these documents with the final itinerary.
If your flight route changed after the original research, recheck the new transit country.
Recheck Every Traveler Separately
Do not review a family or group as one unit.
Check each traveler by name.
For example:
Traveler 1
- ✓Passport valid
- ✓Visa confirmed
- ✓Transit rules checked
- ✓Health documents ready
Traveler 2
- ✓Passport valid
- ✓Different visa requirement checked
- ✓Transit rules checked
- ✓Health documents ready
Child
- ✓Passport valid
- ✓Visa confirmed
- ✓Consent document checked
- ✓Birth or custody documents checked where required
This catches problems that a single group checklist can hide.
Compare Names One Last Time
Put the passport beside your booking confirmations.
Compare the traveler’s name on:
- ✓Passport
- ✓Airline reservation
- ✓Visa
- ✓eVisa
- ✓Travel authorization
- ✓Vaccination certificate where relevant
- ✓Driving documents
Look for real errors such as:
- ✓Wrong surname
- ✓Misspelling
- ✓Previous legal name
- ✓Wrong passenger
- ✓Missing important name information
If something appears wrong, contact the responsible airline or authority before departure.
Do not wait until check-in.
Check Passport Numbers Across Electronic Documents
Passport-number mistakes are easy to miss because the numbers can look similar.
Check the number on:
- ✓eVisa
- ✓ETA
- ✓ESTA or similar authorization
- ✓Airline profile where entered
- ✓Arrival registration
- ✓Other passport-linked approvals
If you renewed your passport after receiving an authorization, check whether the approval still applies to the new passport.
Do not assume it transferred automatically.
Review Your Final Flight Route
Open the actual ticket rather than relying on memory.
Write down every country where the aircraft stops.
For example:
New York → London → Istanbul → Bangkok
Then check:
- ✓UK transit
- ✓Türkiye transit
- ✓Thailand entry
Also check whether you:
- ✓Change terminals
- ✓Collect baggage
- ✓Recheck baggage
- ✓Change airports
- ✓Travel on separate tickets
The final route matters more than the route you originally planned.
Check Your First Accommodation Information
Make sure you can access:
- ✓Hotel or accommodation name
- ✓Full address
- ✓Booking number
- ✓Telephone number where useful
Save the first address offline.
This can help with:
- ✓Immigration questions
- ✓Arrival forms
- ✓Airport transportation
- ✓Lost internet connection
You do not need to print every accommodation on a long trip unless a particular entry rule requires it.
Confirm Your Return or Onward Travel
If the destination may require proof that you will leave, make sure the booking is still valid.
Check:
- ✓Departure date
- ✓Passenger name
- ✓Destination
- ✓Booking status
Save the confirmation offline.
If you changed your itinerary after applying for a visa, make sure the new dates still fit the conditions of your entry permission.
Review Health Documents
If your route requires vaccination proof or another health document, inspect the actual record.
Do not simply remember that you “got the vaccine.”
Check:
- ✓Traveler name
- ✓Vaccination date
- ✓Required waiting period
- ✓Certificate validity
- ✓Signature
- ✓Official stamp where required
Carry the original where the destination requires it.
Keep the backup separately.
Review Medication Documents
For travelers carrying prescription medicine, confirm that the documents match what you are actually packing.
Check:
- ✓Medicine name
- ✓Generic name where useful
- ✓Prescription
- ✓Doctor’s letter where required
- ✓Quantity
- ✓Destination restrictions
- ✓Transit-country restrictions
Keep essential medicine and supporting records in your carry-on where permitted.
Check Driving Documents
If you plan to drive, review:
- ✓Driver’s-license validity
- ✓IDP requirement
- ✓IDP validity
- ✓Rental-company requirements
- ✓Additional-driver documents
- ✓Cross-border rental permission
- ✓Insurance
If your road trip crosses several countries, check each one.
A valid IDP does not automatically mean the rental company allows its vehicle across every border.
Review Your Document Backups
Confirm that your backup system actually works.
Check that you have:
- ✓Passport scan
- ✓Visa copy
- ✓Insurance information
- ✓Health-document copy where relevant
- ✓Emergency contacts
- ✓Driving-document copies where useful
Then make sure the backups are not all stored with the originals.
A backup that disappears with the passport has limited value.
Test Your Offline Travel Folder
Put your phone into airplane mode.
Then try to open:
- ✓Visa
- ✓Hotel address
- ✓Flight itinerary
- ✓Insurance information
- ✓Emergency contacts
- ✓Passport backup
If the files will not open, they are not truly available offline.
Fix that before travel.
Do a 24-Hour Travel Document Check
The day before departure, the check should be shorter.
At this stage, you are confirming location and access rather than researching the whole trip again.
Passport
- ✓In hand
- ✓Correct traveler
- ✓Valid for destination
- ✓No serious damage
Entry Permission
- ✓Visa ready
- ✓eVisa ready
- ✓ETA or authorization approved
- ✓Passport number matches
Transit
- ✓Connection requirements checked
- ✓Correct documents ready
Health
- ✓Required certificate packed
- ✓Medicine paperwork packed
Children
- ✓Child passports packed
- ✓Consent documents ready
- ✓Other required family documents ready
Driving
- ✓Driver’s license packed
- ✓IDP packed where required
- ✓Rental confirmation available
Insurance
- ✓Policy available
- ✓Emergency number saved
Backups
- ✓Digital copies accessible
- ✓Paper backups separate
- ✓Trusted emergency contact has useful information where needed
Where Should You Pack Your Travel Documents?
Keep border and identity documents in your personal carry-on.
A useful setup is:
Main Document Folder
- ✓Passport
- ✓Visa papers
- ✓Required health certificate
- ✓Child consent documents
- ✓Other documents needed during check-in or immigration
Separate Backup Location
- ✓Passport copy
- ✓Backup card
- ✓Emergency contact sheet
Phone
- ✓Offline travel documents
- ✓Insurance
- ✓Hotel address
- ✓Flight details
Do not place your only passport, visa certificate, or important medical document in checked baggage.
Create One Airport Document Routine
Airports become easier when you always return documents to the same location.
For example:
Take passport out → complete check → immediately return passport to zipped inner pocket
Do not put it:
- ✓On top of the suitcase
- ✓In the seat beside you
- ✓Loose in a tray
- ✓In a jacket you may remove
- ✓Into a different bag after every check
A fixed routine reduces simple loss.
Do Not Make Last-Minute Changes Without Rechecking Documents
A change 24 hours before departure can still affect travel requirements.
Examples include:
- ✓Different flight
- ✓New transit country
- ✓Changed airport
- ✓Added traveler
- ✓New rental-car plan
- ✓Different destination
- ✓Passport replacement
If something important changes, quickly ask:
Does this change affect any travel document?
That one question can prevent a new problem created by a last-minute booking change.
Complete Pre-Trip Travel Document Checklist
Use this final checklist before an international trip.
Passport
- ✓Passport belongs to the correct traveler
- ✓Expiration date checked
- ✓Destination validity rule checked
- ✓Blank pages checked where relevant
- ✓Passport condition checked
- ✓Child passports checked separately
Visa and Entry Permission
- ✓Visa requirement checked
- ✓Correct visa type obtained
- ✓Visa validity checked
- ✓Permitted stay checked
- ✓Number of entries checked
- ✓eVisa checked
- ✓ETA or other authorization checked
- ✓Passport number matches authorization
Transit
- ✓Every transit country checked
- ✓Transit visa requirement checked
- ✓Airside transfer confirmed
- ✓Baggage collection confirmed
- ✓Terminal changes checked
- ✓Airport changes checked
- ✓Separate-ticket consequences checked
Flight Booking
- ✓Passenger name checked against passport
- ✓Final route confirmed
- ✓Return or onward booking confirmed
- ✓Booking available offline
Accommodation
- ✓First accommodation confirmed
- ✓Address available offline
- ✓Host details ready where relevant
Health
- ✓Destination health-document rules checked
- ✓Transit health rules checked
- ✓Required vaccination certificate ready
- ✓Certificate dates checked
- ✓Medical waiver ready where applicable
- ✓Prescription paperwork ready
Children
- ✓Passport
- ✓Visa
- ✓Consent letter where required
- ✓Birth or custody documents where relevant
- ✓Health documents
- ✓Airline child-travel requirements
Driving
- ✓Driver’s license valid
- ✓IDP requirement checked
- ✓IDP valid
- ✓Rental-company requirements checked
- ✓Insurance checked
- ✓Multi-country driving rules checked
Insurance
- ✓Policy covers destinations
- ✓Policy dates cover full trip
- ✓Planned activities checked
- ✓Emergency number saved
- ✓Policy available offline
Digital and Paper Backups
- ✓Passport copy
- ✓Visa copy
- ✓Insurance copy
- ✓Health-document copy
- ✓Emergency contacts
- ✓Offline files tested
- ✓Copies stored separately from originals
Final Carry-On Check
- ✓Passport
- ✓Visa documents
- ✓Required health documents
- ✓Child documents
- ✓Driver’s license
- ✓IDP where needed
- ✓Essential medication
- ✓Prescription documents
- ✓Insurance information
Frequently Asked Questions
Common mistakes include insufficient passport validity, missing visas, incorrect passport numbers, name mismatches, ignored transit rules, missing child documents, and keeping required documents in checked luggage.
No. Passport-validity requirements vary by destination. Check the exact country instead of applying one six-month rule to every trip.
Possibly, but the destination may require extra validity beyond your stay. Check its specific rule before departure.
For international travel, children generally need appropriate individual travel documents according to the countries involved. U.S. child passports also have different validity periods from many adult passports.
No. Visa-free travelers may still need an ETA, onward ticket, arrival form, accommodation information, health document, or other proof.
It depends on the visa and destination. Some visas can remain usable with specific conditions, while electronic permissions may need updating or reapplication. Check the issuing authority after replacing a passport.
A real name mismatch can create check-in or boarding problems. Contact the airline before travel rather than waiting until the airport.
Yes. A connection can create separate immigration requirements, especially if you must leave the international transit area, collect baggage, or change airports.
Yes. Separate tickets can require you to enter a transit country to collect and recheck luggage. That can change the visa requirement.
Follow the destination’s instructions. Even when a digital version is accepted, keeping an offline copy can help if internet access fails.
Important identity and entry documents should remain accessible in your personal carry-on during international travel.
Sometimes it is useful as a backup, but a screenshot does not replace an original document where the original is required.
No. Requirements depend on the destination, route, and current health rules.
Yes. Some health-document rules can depend on recent travel or transit through particular countries.
It depends on the destination and rental company. Check both before driving.
Use caution. Start with official government sources so you know the real process and fees before deciding whether any private service is useful.
Start as soon as you begin planning the trip, especially for passports and visas. Then check again after booking and shortly before departure.
Yes. Requirements can differ by age, nationality, passport, and travel status.
Useful files include visas, travel authorizations, hotel details, flight itineraries, insurance information, and secure backup copies of key documents.
Check the whole trip instead of individual documents in isolation. Review your passport, entry permission, transit route, health requirements, driving documents, and backups together.
Final Thoughts
In short, Most travel document mistakes are preventable because the warning signs usually appear before departure.
The biggest mistake is checking only one thing.
A valid passport does not confirm that the visa is correct. A valid visa does not prove that a transit document is unnecessary. A complete flight booking does not confirm that health, child, or driving documents are ready.
I use a simple order:
passport → entry permission → transit → health → children → driving → insurance → backups
Then I review the actual itinerary from the first flight to the return home.
The goal is not to carry a large folder of unnecessary paperwork. It is to know that each traveler has the correct document for each stage of the trip.
Do the detailed check early, repeat it after major itinerary changes, and perform one final review before leaving home. That gives you time to fix problems while you still have options.

Adnan Ahmed
RoamPlans AuthorTravel Planning Researcher & Editor
Adnan Ahmed is the travel planning researcher and editor behind RoamPlans. He creates clear, practical guides to help travelers compare destinations, plan routes, estimate costs, and avoid common trip-planning mistakes. His work combines careful source research, official travel information, and regular content reviews to keep each guide useful and current.
- ✓Destination Research
- ✓Budget Planning
- ✓Route Planning
- ✓Beginner Travel Guides
Turn This Guide into a Practical Trip Plan
Use the recommended Editorial Policy or explore more free RoamPlans tools.