How to Make a Travel Insurance Claim: Step-by-Step Guide
A travel insurance claim becomes much easier when you start documenting the problem while it is happening ↗, not after you return home. When something goes wrong on a trip, I first protect my health and safety, then I check the relevant policy benefit, contact the insurer when required, and start saving evidence of both what happened and what it cost me.
I also avoid thinking of a claim as simply telling the insurer that something went wrong. A claim normally needs evidence. Depending on the situation, that can include receipts, medical records, airline notices, police or incident reports, booking confirmations, supplier refunds, and proof of payment. Current insurer claim guidance shows that the documents required vary by claim type.
For a beginner traveler, the most useful rule is simple: document first, organize carefully, and follow your own policy’s claim instructions and deadlines. The insurer decides whether the loss meets the policy terms; good documentation helps it understand exactly what happened and how much eligible financial loss remains.
Travel insurance claim procedures, deadlines, covered losses, and required documents vary by policy and insurer. This guide explains a practical claims process, but your own policy and insurer’s claim instructions should always be treated as the final requirements.
Key Takeaways
- ✓Protect your health and safety first during an emergency.
- ✓Contact the insurer or assistance service as soon as required by the policy.
- ✓Do not wait until you return home to start collecting evidence.
- ✓Keep receipts for expenses you may later claim.
- ✓Save proof of what caused the loss, not just proof that you spent money.
- ✓Medical claims can require medical reports, bills, invoices, and proof of payment.
- ✓Baggage claims may require an airline, police, or other incident report in addition to receipts or proof of ownership.
- ✓Delay claims can require evidence showing both the cause and length of the delay.
- ✓Cancellation claims commonly need proof of the cancellation reason, original trip costs, and refunds or credits received.
- ✓Keep records of calls, emails, claim numbers, and documents submitted.
- ✓Do not assume every expense caused by the same event belongs under the same policy benefit.
- ✓If a claim is denied, read the exact reason and policy section before deciding what to do next.
- ✓U.S. consumers with unresolved insurer problems can contact their state insurance department. NAIC says state regulators can investigate issues such as unfair claim delays or denials and failures to honor a policy.
What Is a Travel Insurance Claim?
A travel insurance claim is a formal request asking your insurer to review a loss and determine whether it qualifies for payment under your policy.
For example, you might make a claim after:
- ✓Canceling a trip for a covered reason
- ✓Receiving emergency medical treatment abroad
- ✓Experiencing a covered trip interruption
- ✓Losing checked baggage
- ✓Having belongings stolen
- ✓Experiencing a qualifying travel delay
- ✓Paying eligible extra expenses
- ✓Needing covered medical transportation
You are not simply asking:
“Did something bad happen?”
You are asking:
“Does this specific loss meet the policy terms, and can I prove the amount I am claiming?”
A Claim Does Not Guarantee Payment
Filing a claim means asking the insurer to review your loss.
It does not mean the insurer automatically owes the amount requested.
The insurer can look at:
- ✓Policy coverage
- ✓Covered reasons
- ✓Exclusions
- ✓Limits
- ✓Deductibles
- ✓Documentation
- ✓Other reimbursements
- ✓Claim procedures
NAIC advises travelers to review what their insurance covers and what limitations or exclusions apply before relying on the policy.
That is why I would read the relevant benefit before submitting a claim.
Claims Are About Two Things: Event and Loss
Almost every travel insurance claim becomes easier to understand if you separate it into two questions.
1. What Happened?
You need evidence showing the event.
For example:
- ✓Doctor says you cannot travel
- ✓Airline cancels a flight
- ✓Baggage does not arrive
- ✓Phone is stolen
- ✓Hospital treats you abroad
2. What Did You Lose Financially?
You need evidence of the financial impact.
For example:
- ✓Non-refundable hotel
- ✓Medical bill
- ✓Essential clothes purchased during baggage delay
- ✓Additional hotel caused by a covered delay
- ✓Lost personal property
A receipt can show how much you paid.
It does not always prove why the expense qualifies.
That is why both parts matter.
Start the Claim Before You Get Home
One of the biggest claim mistakes is thinking:
“I will sort all of this out after my trip.”
Some tasks are much easier while the event is happening.
For example:
- ✓Getting an airline baggage report
- ✓Asking a doctor for medical documentation
- ✓Filing a police report
- ✓Obtaining an official delay notice
- ✓Photographing damaged property
- ✓Keeping original receipts
Allianz’s current claim guidance recommends collecting documentation such as receipts, medical reports, police reports, itineraries, and travel-delay evidence as events occur.
You may submit the formal claim later, depending on the policy.
But start building the evidence immediately.
Step 1: Deal With the Immediate Problem
Insurance paperwork should not come before urgent health or safety.
If you are seriously ill or injured:
Get appropriate medical help.
If you are the victim of a crime:
Get to a safe location and contact local authorities where appropriate.
If your flight is canceled:
Work with the airline on reasonable alternatives.
If your baggage is missing:
Report it to the carrier before leaving the airport where possible.
Then begin dealing with the insurance side.
Step 2: Find the Relevant Policy Benefit
Open your policy and identify which benefit may apply.
Examples include:
- ✓Trip cancellation
- ✓Trip interruption
- ✓Emergency medical
- ✓Travel delay
- ✓Baggage delay
- ✓Baggage loss
- ✓Medical evacuation
Do not immediately assume that every expense resulting from one event belongs to one claim category.
For example, an illness during travel could potentially create:
- ✓Medical expenses
- ✓Trip interruption expenses
- ✓Additional transportation
Different policy benefits may have different limits and documentation requirements.
Match the Problem to the Correct Benefit
Consider these examples.
Flight Is Delayed Overnight
This may involve:
Travel delay
rather than trip cancellation.
You Become Sick Before Departure and Cannot Travel
This may involve:
Trip cancellation
You Become Sick After Departure and Need Hospital Treatment
This may involve:
Emergency medical
Illness Forces You to Return Home Early
There may also be a:
Trip interruption
question.
Understanding the correct benefit makes the claim easier to organize.
For a broader explanation of these coverage categories, use What Does Travel Insurance Cover — and What Does It Not Cover?
Step 3: Read the Claim Conditions
Once you identify the likely benefit, read the conditions attached to it.
Look for:
- ✓Reporting deadline
- ✓Claim filing deadline
- ✓Required documents
- ✓Notification requirements
- ✓Authorization requirements
- ✓Waiting period
- ✓Deductible
- ✓Maximum benefit
Do this before making unnecessary assumptions about reimbursement.
Pay Attention to Deadlines
Insurance policies can set deadlines for:
- ✓Reporting an incident
- ✓Notifying the insurer
- ✓Submitting a claim
- ✓Providing supporting documents
The exact period varies.
Do not use a deadline from another insurer or an online article.
Use the deadline in your own policy.
If you are unsure, contact the insurer and ask:
“What is the deadline for notifying you and submitting documents for this type of claim?”
Record the answer.
Step 4: Contact the Insurer When Required
For a significant event, contact your insurer or emergency assistance service as soon as reasonably possible.
Tell them:
- ✓Your name
- ✓Policy number
- ✓What happened
- ✓When it happened
- ✓Where you are
- ✓Which trip is affected
Then ask:
- ✓Which benefit may apply?
- ✓What documents should I collect?
- ✓Is authorization required?
- ✓What deadline applies?
- ✓How should I submit the claim?
For medical emergencies, evacuation, or other expensive arrangements, the policy may require insurer involvement or authorization.
Save the Claim Number
When a claim is opened, save:
- ✓Claim number
- ✓Date opened
- ✓Insurer contact
- ✓Name of representative where available
Do not rely only on memory.
I would keep a simple record:
Claim number: 123456
Opened: June 14
Representative: Sarah
Documents requested: medical report + itemized bill + receipts
This becomes useful if the claim takes several weeks.
Step 5: Start a Claim Folder

Create one physical or digital folder for the claim.
I would divide it into:
Policy
- ✓Policy certificate
- ✓Benefit wording
- ✓Policy number
Event Evidence
- ✓Medical report
- ✓Airline notice
- ✓Police report
- ✓Incident report
Financial Evidence
- ✓Receipts
- ✓Invoices
- ✓Proof of payment
- ✓Refund statements
Communication
- ✓Emails
- ✓Claim number
- ✓Call notes
This simple organization prevents important evidence from becoming scattered across your phone and inbox.
Keep a Timeline of What Happened
A short timeline can be extremely useful for complicated claims.
For example:
June 8 — flight scheduled for 6:00 PM
June 8, 4:15 PM — airline announces cancellation
June 8, 5:00 PM — airline offers next flight following morning
June 8, 6:10 PM — booked airport hotel
June 9, 8:20 AM — departed on replacement flight
Then attach the evidence supporting those entries.
Do not make the timeline dramatic.
Keep it factual.
Step 6: Save Every Relevant Receipt

Receipts are one of the most important forms of financial evidence.
Allianz’s claim guidance specifically emphasizes saving receipts, while Travel Guard’s current documentation lists repeatedly require receipts for eligible medical, delay, baggage, and interruption expenses.
Keep receipts for potentially eligible expenses such as:
- ✓Medical treatment
- ✓Prescriptions
- ✓Hotel
- ✓Meals during covered delay
- ✓Replacement essentials
- ✓Transportation
- ✓Other claimed expenses
A bank statement can help prove payment, but the insurer may still want an itemized receipt showing what you purchased.
Photograph Receipts Immediately
Paper receipts can:
- ✓Fade
- ✓Tear
- ✓Get wet
- ✓Get lost
Take a photograph as soon as you receive one.
Make sure the image clearly shows:
- ✓Merchant
- ✓Date
- ✓Item or service
- ✓Amount
Allianz specifically recommends photographing receipts and invoices during travel to preserve claim documentation.
Do Not Mix Normal Vacation Spending With Claim Expenses
Suppose your flight is delayed overnight.
You buy:
- ✓Hotel room
- ✓Dinner
- ✓Designer sunglasses
- ✓Tourist attraction ticket
Do not assume everything you purchase during the delay becomes a travel insurance expense.
Keep the claim focused on expenses that could meet the applicable benefit’s definition.
The insurer will decide eligibility.
Step 7: Collect Proof of the Event
A receipt proves spending.
You also need evidence explaining why the spending happened.
Different claims need different evidence.
Medical Claim
Could include:
- ✓Medical report
- ✓Doctor note
- ✓Hospital discharge record
- ✓Diagnosis
- ✓Treatment information
Flight Delay
Could include:
- ✓Airline delay notice
- ✓Cancellation email
- ✓Carrier statement
- ✓Updated itinerary
Stolen Property
Could include:
- ✓Police report
- ✓Incident report
- ✓Other evidence required by the policy
Lost Baggage
Could include:
- ✓Airline baggage report
- ✓Property irregularity report
- ✓Carrier correspondence
The required documents depend on the policy and claim type. Current Travel Guard claim documentation shows this event-specific approach clearly.
Step 8: Ask for Official Documentation Before Leaving
Some evidence becomes much harder to obtain later.
At a Hospital
Ask for:
- ✓Itemized bill
- ✓Medical report
- ✓Receipt
- ✓Discharge paperwork
At the Airport
Ask for or save:
- ✓Baggage report
- ✓Delay confirmation
- ✓Cancellation notice
After a Theft
Where appropriate and safe, obtain the police or official incident report required by your policy.
The State Department’s current Costa Rica travel guidance, for example, specifically notes that a police report with a case number can be needed for insurance claims following crime.
Requirements differ by destination and insurer, so check your own policy.
What If You Cannot Get a Police Report?
Do not invent one.
Document what you did.
For example:
- ✓When you attempted to report the incident
- ✓Which authority you contacted
- ✓Any case or reference number
- ✓Any alternative report available
Then contact the insurer and ask what alternative evidence it will accept.
Never create false documentation to strengthen a claim.
Step 9: Keep Proof of Ownership for Lost or Stolen Items
If you claim for baggage or personal property, the insurer may ask you to show that:
- ✓You owned the item
- ✓The item had a certain value
Useful evidence could include:
- ✓Purchase receipt
- ✓Order confirmation
- ✓Photograph
- ✓Bank or card record
- ✓Product information
Current insurer claim guidance commonly requires receipts or other supporting evidence for baggage losses.
Do not assume the insurer will automatically accept the replacement price you find online.
Photograph Valuable Items Before Travel
For expensive belongings, it can be useful to have a basic record before departure.
For example:
- ✓Camera
- ✓Laptop
- ✓Phone
- ✓Sporting equipment
A photo does not automatically prove the claim value.
But it can help show that the item was part of your travel belongings.
Keep purchase records for expensive items where possible.
Step 10: Keep Evidence of Supplier Refunds and Credits
This is especially important for:
- ✓Trip cancellation
- ✓Trip interruption
- ✓Airline disruption
- ✓Hotel cancellation
- ✓Tour cancellation
Your original booking cost is not always the same as your final insurance loss.
Suppose:
Hotel cost: $1,500
Hotel refund:
$1,000
Remaining loss:
$500
The insurer needs to understand the remaining loss.
Current claim documentation from Travel Guard specifically asks for information about refunds, settlements, or credits received or expected from other parties.
Travel Credits Should Also Be Documented
If an airline gives you a credit instead of cash, save:
- ✓Credit amount
- ✓Expiration date
- ✓Terms
- ✓Airline message
Do not hide it from the insurer.
Ask how the policy treats the credit when calculating the eligible loss.
Step 11: Keep Proof of Original Trip Cost
For claims involving canceled or interrupted travel, keep:
- ✓Flight invoice
- ✓Hotel confirmation
- ✓Tour invoice
- ✓Cruise invoice
- ✓Booking receipt
- ✓Payment confirmation
Allianz’s current cancellation claim guidance identifies the trip itinerary, travel-purchase receipts, supplier refund terms, and proof of the cancellation event among documents that may support a claim.
This helps establish what you paid before the problem occurred.
Medical Claims Need More Than a Credit-Card Charge
A card statement may show:
Hospital — $850
But it may not explain:
- ✓What treatment you received
- ✓Why it was medically necessary
- ✓Which services were charged
For a medical claim, try to obtain an itemized medical bill and medical record.
Travel Guard’s current medical-claim documentation includes discharge records, bills, receipts, invoices, and incident information among documents that may be required.
For detailed medical coverage rather than claim procedure, use Travel Medical Insurance Guide for International Travelers.
What Documents Do You Need for a Trip Cancellation Claim?
Cancellation claims commonly require two groups of evidence.
Proof of Why You Canceled
For example:
- ✓Medical documentation
- ✓Official incident evidence
- ✓Other proof relating to the covered reason
Proof of What You Lost
For example:
- ✓Original booking
- ✓Payment receipt
- ✓Supplier cancellation terms
- ✓Refund or credit statement
- ✓Remaining non-refundable amount
Allianz’s May 2026 cancellation guidance lists trip itineraries, travel-purchase receipts, supplier refund policies, and evidence of the incident among examples of supporting documentation.
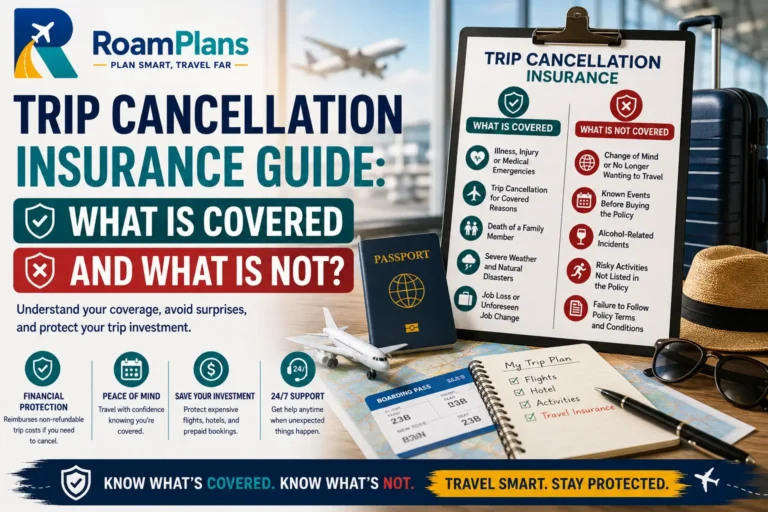
For the full coverage rules behind cancellation, use Trip Cancellation Insurance Guide: What Is Covered and What Is Not?
What Documents Do You Need for a Travel Delay Claim?
A delay claim may require evidence showing:
why the delay happened
and
how long it lasted.
Travel Guard’s current documentation for trip delay includes:
- ✓Itinerary
- ✓Receipts for claimed meals or accommodation
- ✓Carrier or other report confirming the cause and duration
- ✓Documentation of refunds or credits from other parties
This is why an airline message showing only:
“Your flight is delayed”
may not be enough if the insurer needs the actual delay duration.
Save the Updated Itinerary
If the airline rebooks you, save:
- ✓Original itinerary
- ✓Replacement itinerary
- ✓Cancellation or delay notice
Together they show:
- ✓What was supposed to happen
- ✓What actually happened
This can be useful for both delay and interruption claims.
What Documents Do You Need for a Baggage Delay Claim?
If checked baggage is delayed, report it to the carrier.
Save:
- ✓Baggage tag
- ✓Airline baggage report
- ✓Delivery information
- ✓Time bag was returned
- ✓Receipts for necessary replacement items
Do not assume every purchase made while waiting for baggage is eligible.
Check the policy’s waiting period, benefit limit, and eligible-expense rules.
What Documents Do You Need for Lost or Stolen Baggage?
Depending on the situation, useful records can include:
- ✓Carrier baggage report
- ✓Police or incident report
- ✓Proof of ownership
- ✓Receipts
- ✓Photographs
- ✓Proof of value
- ✓Airline settlement
- ✓Insurance claim documents
Travel Guard’s current baggage documentation asks for an accident, incident, police, or irregularity report and receipts for claimed lost, stolen, or damaged belongings.
Airline Baggage Claim and Travel Insurance Claim Are Different
If the airline loses your checked bag, report it to the airline first.
The airline may:
- ✓Locate the bag
- ✓Deliver it later
- ✓Reimburse some loss
Your travel insurer may then consider eligible remaining loss according to the policy.
Keep the airline’s response.
Do not submit only an insurance claim and ignore the carrier’s reporting procedure.
What Documents Do You Need for Trip Interruption?
A trip interruption claim can involve:
- ✓Proof of the covered event
- ✓Original itinerary
- ✓Unused prepaid costs
- ✓Replacement transportation
- ✓Supplier refunds
Travel Guard’s current interruption documentation lists proof of travel, documentation supporting the reason for interruption, incident reports, receipts, and medical documentation where relevant.
The detailed rules about whether an interruption is covered belong to the underlying policy benefit; this article stays focused on proving and submitting the claim.
Create a Claim Evidence Table

For a complicated claim, I would create something like this:
| Claimed Loss | Amount | Proof of Event | Proof of Cost |
|---|---|---|---|
| Airport hotel | $180 | Airline cancellation notice | Hotel receipt |
| Dinner | $45 | Airline cancellation notice | Restaurant receipt |
| Taxi | $32 | New hotel/flight arrangement | Taxi receipt |
| Medical bill | $600 | Medical report | Itemized bill |
This helps reveal missing evidence before submission.
Every Claimed Expense Should Tell a Clear Story
A good claim file answers:
What happened?
When did it happen?
Why is this expense connected to it?
How much did you pay?
Did anyone refund you?
The insurer still decides whether the expense is covered.
But clear evidence makes the loss easier to understand.
Do Not Exaggerate the Claim
Only claim:
- ✓Real losses
- ✓Correct amounts
- ✓Accurate circumstances
Do not:
- ✓Increase purchase values
- ✓Alter receipts
- ✓Invent missing expenses
- ✓Hide refunds
- ✓Change the description of an incident
A claim should reflect what actually happened.
If you are uncertain whether an expense belongs in the claim, list it accurately and ask the insurer rather than changing the facts.
Keep Originals Until the Claim Is Finished
Even when you upload digital copies, keep original documents where practical until:
- ✓Claim is decided
- ✓Payment is complete
- ✓Any review is complete
This can include:
- ✓Receipts
- ✓Medical reports
- ✓Police records
- ✓Supplier statements
Do not discard them immediately after uploading photographs.
Save a Copy of Everything You Submit
Your claim folder should contain the same documents the insurer received.
Save:
- ✓Completed claim form
- ✓Uploaded documents
- ✓Emails
- ✓Submission confirmation
If something later appears missing, you can show what you sent and when.
Keep a Claim Communication Log
NAIC’s consumer guidance recommends keeping notes of communications with insurers during claim disputes, including who you spoke with and when.
I would record:
| Date | Contact | What Happened |
|---|---|---|
| June 14 | Claims department | Claim opened |
| June 17 | Medical report submitted | |
| June 21 | Claims examiner | Asked for itemized bill |
This becomes particularly useful if the insurer later requests documents you already sent.
Do Not Confuse Assistance With Claim Approval
An insurer’s assistance service may help during an emergency.
For example, it may help:
- ✓Find a hospital
- ✓Coordinate transportation
- ✓Explain next steps
That does not automatically mean every resulting expense has been approved for reimbursement.
Assistance and claim decisions are related but different.
Always keep the documentation.
My Claim Rule While Traveling
Whenever an insurable travel problem happens, I use four words:
Report. Document. Save. Confirm.
Report
Tell the appropriate organization:
- ✓Insurer
- ✓Airline
- ✓Police
- ✓Hotel
- ✓Medical provider
depending on the event.
Document
Get evidence showing what happened.
Save
Keep every relevant receipt and record.
Confirm
Ask the insurer what documentation and deadline apply.
Doing these four things during the trip can make the formal claim much easier later.
Step 12: Complete the Claim Form Carefully
Once your evidence is organized, complete the insurer’s claim form.
Most claim forms ask for basic details such as:
- ✓Policy information
- ✓Traveler’s name
- ✓Trip dates
- ✓Type of claim
- ✓Date of loss
- ✓Location
- ✓Description of what happened
- ✓Amount being claimed
Current Allianz claims guidance describes its process around explaining who, what, where, and how, then uploading documents proving the loss.
Take your time with this section.
A short, accurate description is usually better than a long story that mixes unrelated details.
Describe What Happened in a Clear Timeline
When I complete the incident description, I normally use this order:
What was supposed to happen?
What went wrong?
When did it happen?
What did I do afterward?
What financial loss resulted?
For example:
Flight scheduled for June 12 at 7:00 PM. The airline canceled the flight at 4:30 PM and rebooked me for June 13 at 9:00 AM. I needed one hotel night and dinner while waiting for the replacement flight.
That explanation is easier to review than a long paragraph containing unrelated details about the entire vacation.
Keep the Description Factual
Avoid guessing about things you cannot verify.
Instead of:
“The airline canceled because it did not have enough staff.”
write:
“The airline canceled the flight. Its notice stated operational reasons.”
if that is what the documentation says.
The same applies to medical claims.
Do not diagnose yourself.
Use the diagnosis or information provided by the medical professional.
Make Sure the Dates Match
Dates are particularly important because the insurer may compare:
- ✓Trip dates
- ✓Policy dates
- ✓Incident date
- ✓Medical-treatment date
- ✓Cancellation date
- ✓Receipt dates
- ✓Airline notices
Check that your claim form and supporting documents tell the same timeline.
A simple typing error can create unnecessary questions.
Use the Same Names as Your Policy and Bookings
Make sure traveler names match the policy and supporting documents as closely as possible.
This is especially useful when claims involve:
- ✓Several family members
- ✓Different surnames
- ✓Children
- ✓Group bookings
If there is a legitimate name difference, such as a booking made under a maiden name, explain it rather than leaving the insurer to guess.
Step 13: Calculate the Exact Amount You Are Claiming
Do not simply enter the total cost of your vacation.
Calculate the specific loss connected to the claim.
I use:
Original eligible expense
minus
refunds, credits, reimbursements, or other recoveries
equals
remaining claimed loss
For example:
Original tour:
$1,200
Supplier refund:
$500
Remaining financial loss:
$700
The insurer will still decide whether that $700 qualifies under the policy.
Build the Claim Amount Expense by Expense
For a complicated claim, I would make a table like this:
| Expense | Original Cost | Refund/Credit | Amount Claimed |
|---|---|---|---|
| Flight | $1,400 | $400 | $1,000 |
| Hotel | $850 | $850 | $0 |
| Tour | $600 | $150 | $450 |
| Transfer | $100 | $0 | $100 |
Total amount requested for review:
$1,550
Then attach evidence supporting each line.
This is clearer than asking the insurer to calculate the loss from a large folder of receipts.
Do Not Include Fully Refunded Costs as Unrecovered Loss
If a supplier refunded an expense in full, record that refund.
For example:
Hotel booking:
$900
Hotel refund:
$900
Remaining hotel loss:
$0
You may still include the hotel documentation where it helps explain the trip, but do not represent that same $900 as an unrecovered financial loss.
Current Travel Guard claims guidance asks claimants to document refunds, settlements, or credits received or expected from other parties.
What If You Receive a Refund After Filing the Claim?
Tell the insurer.
For example, you might file a claim while an airline refund is still pending.
Two weeks later, the airline sends:
$600
Update the insurer so it can calculate the remaining loss accurately.
Do not wait for the insurer to discover the refund itself.
What If You Receive a Travel Credit?
Document it clearly.
Save:
- ✓Credit value
- ✓Expiration date
- ✓Restrictions
- ✓Supplier communication
How the credit affects the claim depends on the policy and circumstances.
Let the insurer make that decision.
Your job is to disclose what you received.
Step 14: Upload Supporting Documents in an Organized Way

Online claims systems commonly allow travelers to upload supporting evidence with the claim. Allianz says proof of loss is needed to begin reviewing a claim and recommends uploading relevant documentation when submitting.
Before uploading, I rename files clearly.
Instead of:
IMG_4837.jpg
I would use:
Airline-Cancellation-Notice.pdf
or:
Hospital-Itemized-Bill.jpg
Clear names make your own records easier to manage too.
Group Documents by Purpose
For example:
Event Evidence
- ✓Airline cancellation notice
- ✓Medical report
- ✓Police report
Financial Evidence
- ✓Hotel receipt
- ✓Medical invoice
- ✓Tour booking
Refund Evidence
- ✓Airline refund
- ✓Hotel credit
- ✓Tour cancellation statement
Policy and Trip Evidence
- ✓Insurance certificate
- ✓Original itinerary
You do not need to create a professional legal file.
You simply want the connection between documents to be obvious.
Make Sure Uploaded Documents Are Readable
Before submitting a photograph or scan, check:
- ✓Entire page is visible
- ✓Text can be read
- ✓Amount is visible
- ✓Date is visible
- ✓Important information is not cut off
A blurry photograph of a receipt may create another request for evidence.
If a receipt has printing on both sides, save both sides.
Do Not Upload Hundreds of Unrelated Documents
More documents do not automatically make a claim stronger.
Send the documents relevant to:
- ✓Event
- ✓Claimed expense
- ✓Refund
- ✓Required policy condition
A folder containing every email from your vacation can make the actual evidence harder to identify.
Step 15: Review Everything Before Submission
Before I press submit, I check five things:
- ✓Does the incident description match the evidence?
- ✓Do the amounts match the receipts?
- ✓Have refunds and credits been disclosed?
- ✓Are required documents included?
- ✓Have I saved my own copy?
Current insurer claim processes emphasize providing the claim details and supporting documents together so the claim can be reviewed.
Save the Submission Confirmation
After submitting, keep:
- ✓Confirmation email
- ✓Claim number
- ✓Submission date
- ✓Copy of claim form
- ✓Documents submitted
Allianz says claimants receive confirmation with a claim number that can then be used to check claim status.
Do not delete this message.
Step 16: Understand Primary vs Secondary Claims
Some travel insurance benefits may operate on a primary basis.
Others may be secondary or excess to other applicable insurance.
This can affect the claim process significantly.
For example, Travel Guard’s current documentation says an Explanation of Benefits from another health insurer may be required when medical coverage is secondary or excess.
That means you may need to involve another insurer before the travel insurer can finish reviewing the claim.
What Does Secondary Coverage Mean for Your Claim?
Suppose you receive:
$2,000 medical bill abroad.
Your regular health insurer may need to review the bill first.
It might pay:
$1,200
and leave:
$800
You may then need to provide the travel insurer with the health insurer’s:
- ✓Explanation of Benefits
- ✓Payment statement
- ✓Denial
- ✓Remaining balance
The travel insurer then reviews the remaining eligible loss under its own policy.
What Is an Explanation of Benefits?
An Explanation of Benefits, often called an EOB, is a statement from a health insurer showing how it processed a medical claim.
It can show:
- ✓Amount billed
- ✓Amount considered
- ✓Amount paid
- ✓Amount not paid
- ✓Reason for non-payment
Travel Guard currently lists EOBs among documents that may be required when travel medical coverage is secondary or excess.
An EOB is not necessarily the same thing as a medical bill.
Keep both where needed.
What If Your Normal Health Insurer Denies the Overseas Bill?
Keep the denial.
A denial can be important evidence for a secondary travel medical claim.
Do not simply tell the travel insurer:
“My health insurance did not cover it.”
Provide the insurer’s written decision where required.
For detailed questions about how overseas medical coverage works, use Travel Medical Insurance Guide for International Travelers.
Baggage Coverage Can Also Be Secondary
NAIC’s April 2026 travel insurance guidance describes baggage loss/delay or personal-effects insurance as secondary coverage and notes that travelers may also have protection through sources such as homeowners insurance or credit-card benefits.
That means a baggage insurer may ask about other available protection.
For example:
- ✓Airline reimbursement
- ✓Homeowners or renters insurance
- ✓Credit-card benefits
Do not assume every policy handles coordination in exactly the same way.
Follow your policy’s instructions.
What If the Airline Pays Part of a Baggage Loss?
Document it.
Suppose:
Lost belongings claimed value:
$1,500
Airline pays:
$700
You now have:
$800 remaining loss
before considering the travel policy’s own limits and exclusions.
Provide the airline’s settlement information to the travel insurer.
Step 17: Track the Claim After Submission
Submitting the form is not always the end of the process.
The insurer may:
- ✓Confirm receipt
- ✓Assign a claim examiner
- ✓Review documents
- ✓Request additional information
- ✓Issue a decision
Current Allianz guidance says claimants can check claim status online and that additional documents can be uploaded to an existing claim.
Travel Guard likewise provides claim-status tools for existing claims.
Do Not Open a Duplicate Claim Just Because You Have Not Heard Back
If you already have a claim number, use it when contacting the insurer.
Opening multiple claims for the same event can create confusion.
Instead:
- ✓Check status
- ✓Contact claims department
- ✓Provide claim number
- ✓Ask whether anything is missing
Keep a record of that communication.
How Often Should You Check the Claim?
You do not need to contact the insurer every day.
Instead, use:
- ✓Online claim status
- ✓Insurer messages
- ✓Stated review timelines
If the insurer requests a document, respond promptly.
If the claim appears inactive beyond the timeframe the insurer communicated, follow up with the claim number.
Step 18: Respond Promptly to Requests for More Information
An insurer may decide that the original documents are not enough.
That does not automatically mean the claim has been denied.
Allianz’s current claims process specifically says the company may request additional documentation after reviewing the initial submission.
Possible requests might include:
- ✓Itemized medical bill
- ✓Doctor statement
- ✓Supplier refund information
- ✓Airline confirmation
- ✓Proof of ownership
- ✓Explanation of Benefits
- ✓Additional receipts
Read the request carefully.
Send Exactly What Was Requested
Suppose the insurer asks for:
an itemized hospital bill.
Sending the same credit-card receipt again may not solve the problem.
Ask:
“Do you need a document showing each medical service and charge?”
if you are unsure.
Then contact the hospital for the correct record.
Keep Evidence of Additional Documents You Submit
After uploading requested information, save:
- ✓File
- ✓Upload confirmation
- ✓Email
- ✓Date submitted
Update your communication log.
For example:
| Date | Action |
|---|---|
| July 4 | Claim submitted |
| July 10 | Insurer requested hospital itemized bill |
| July 12 | Itemized bill uploaded |
| July 15 | Status changed to review |
This becomes useful if the same document is requested again.
What If You Cannot Obtain a Requested Document?
Contact the insurer.
Explain:
- ✓What document you tried to obtain
- ✓Why it is unavailable
- ✓What alternative evidence you have
Do not create or modify a document.
Ask whether the insurer will accept an alternative.
For example, if an overseas provider will not issue a particular form, you may still have:
- ✓Medical report
- ✓Invoice
- ✓Proof of payment
- ✓Hospital correspondence
The insurer decides whether that alternative is sufficient.
What If the Document Is in Another Language?
Keep the original.
Ask your insurer whether it needs:
- ✓Translation
- ✓Certified translation
- ✓Any specific format
Do not change the content yourself to make the claim appear stronger.
You can provide an explanation separately if requested.
Step 19: Keep the Claim Organized if Several Benefits Are Involved
One incident can create multiple types of loss.
Suppose you become seriously ill during an international trip.
You may have:
Medical Expense
Hospital bill.
Trip Interruption
Unused prepaid travel or changed transportation where eligible.
Travel Delay or Other Expense
Potentially another benefit depending on circumstances.
Do not assume the insurer will automatically place every receipt under the right section.
Organize them clearly.
Use Separate Expense Categories
For example:
| Category | Expense | Amount |
|---|---|---|
| Medical | Hospital | $1,400 |
| Medical | Prescription | $80 |
| Interruption | Replacement flight | $650 |
| Interruption | Unused tour | $250 |
Then provide supporting documents for each.
The policy determines which benefits actually respond.
Avoid Turning One Claim Into a Coverage Argument
When completing a claim, focus on facts and evidence.
You do not need to write:
“This is definitely covered because section 8 clearly requires you to pay me.”
A stronger submission is usually:
“Attached is the medical report, hospital invoice, proof of payment, replacement flight receipt, and original itinerary.”
Let the insurer review the policy.
If there is later a disagreement about coverage, you can address the specific decision separately.
Step 20: Understand Deductibles and Benefit Limits
The amount you submit is not necessarily the amount you will receive.
The insurer may apply:
- ✓Deductible
- ✓Maximum benefit
- ✓Per-item limit
- ✓Per-day limit
- ✓Other policy restriction
For example:
Eligible medical expense:
$1,000
Applicable deductible:
$250
The payment calculation may differ from simply reimbursing the full $1,000.
The exact calculation depends on the policy.
Baggage Claims May Have Per-Item Limits
Suppose your baggage benefit is:
$2,500
but you lose one expensive camera.
The full $2,500 does not automatically apply to that camera.
Policies may contain smaller limits for:
- ✓Individual items
- ✓Electronics
- ✓Jewelry
- ✓Other categories
This is a coverage calculation rather than a documentation issue, so check the applicable benefit rather than assuming the headline maximum equals your payment.
Travel Delay Claims Can Have Daily or Overall Limits
Imagine you spend:
$400
during a qualifying delay.
Your policy may limit reimbursement based on:
- ✓Per-day maximum
- ✓Total maximum
- ✓Eligible expense definitions
Keep the full $400 in your records accurately.
The insurer can then apply its policy terms.
Do not change receipts or amounts to fit the limit.
Step 21: Do Not Claim the Same Loss Twice
One expense can sometimes involve several possible sources of reimbursement.
For example:
- ✓Airline
- ✓Credit card
- ✓Health insurer
- ✓Travel insurer
You should disclose what you have received from other sources.
NAIC notes that travel insurance products can overlap with protection travelers already have through existing insurance or credit-card benefits.
The policy determines how those benefits coordinate.
Example: Flight Cancellation
Suppose:
Original flight:
$1,000
Airline refunds:
$1,000
Your unrecovered flight loss is:
$0
You might still have other eligible losses related to the disruption, depending on the policy.
But you should not seek another $1,000 reimbursement from travel insurance for the already-refunded airfare as though it were still lost.
Example: Medical Claim
Hospital bill:
$3,000
Health insurer pays:
$1,500
Remaining amount:
$1,500
If your travel policy is secondary, that remaining amount may then be reviewed under its terms.
Again, keep the EOB and medical invoice.
Step 22: Watch for Common Causes of Claim Delays
Claims can take longer when the insurer does not have enough information to complete its review.
Common documentation problems can include:
- ✓Missing receipts
- ✓Missing medical records
- ✓No proof of cancellation reason
- ✓No airline report
- ✓Missing supplier refund information
- ✓Unclear claimed amount
- ✓Missing EOB where secondary coverage applies
Current Travel Guard documentation requirements show that different claim types often require several supporting records rather than one receipt alone.
Mistake: Submitting the Claim Before Calculating the Loss
You can open a claim when appropriate, but before requesting reimbursement, make sure you understand:
- ✓What was paid
- ✓What was refunded
- ✓What remains lost
Otherwise, the insurer may have to ask you for the calculation later.
Mistake: Ignoring an Insurer Request
If the insurer asks for another document, do not assume:
“They already have enough.”
Read the request.
If you believe you already submitted the document, respond with:
- ✓Previous submission date
- ✓Document name
- ✓Copy where helpful
Do not simply ignore the message.
Mistake: Sending Documents Without the Claim Number
When submitting documents after the original claim, make sure they can be connected to the correct file.
Follow the insurer’s submission instructions and include the claim number where required.
Travel Guard’s current claims FAQ, for example, tells customers submitting documentation by email, fax, or mail to associate it with the claim number.
Your insurer may use a different system.
Mistake: Throwing Away Evidence After Uploading It
Keep your copies until the claim is fully resolved.
Digital uploads can fail.
Files can become unreadable.
The insurer may request the document again.
Maintain your own complete claim file.
Mistake: Assuming “Under Review” Means the Claim Will Be Paid
Claim status and claim decision are different things.
A claim being reviewed means the insurer is evaluating:
- ✓Evidence
- ✓Policy
- ✓Loss
It is not an approval.
Allianz’s current claims guidance explicitly notes that filing a claim does not guarantee payment.
Wait for the formal decision.
What Happens After the Insurer Finishes Reviewing the Claim?
Generally, the insurer will determine whether the claimed loss is payable under the policy.
Possible results can include:
- ✓Claim approved
- ✓Claim partly approved
- ✓More information requested
- ✓Claim denied
If the claim is approved, follow the insurer’s payment instructions.
If it is only partly approved, review how the amount was calculated.
If it is denied, read the explanation carefully before taking the next step.
Check the Payment Calculation
Suppose you claimed:
$2,500
but receive:
$1,800
Do not immediately assume there has been an error.
Check whether the difference resulted from:
- ✓Refund
- ✓Deductible
- ✓Maximum benefit
- ✓Per-item limit
- ✓Ineligible expense
- ✓Other policy condition
If the calculation is unclear, ask the insurer to explain it.
Keep the Claim Decision
Save the final:
- ✓Approval
- ✓Payment explanation
- ✓Partial approval
- ✓Denial
with the rest of your claim records.
Do not delete the claim folder as soon as money reaches your account.
You may need the records later if:
- ✓Payment is incorrect
- ✓Another reimbursement arrives
- ✓You ask for reconsideration
My Claim Submission Check
Before submitting a travel insurance claim, I want to be able to answer:
What happened?
Which benefit am I claiming under?
What evidence proves the event?
What evidence proves each expense?
How much did other companies refund me?
What amount remains lost?
Have I met the claim deadline?
Do I have copies of everything?
If those answers are organized, the insurer has a much clearer claim to review.
The next stage is not about adding more paperwork for the sake of it. It is about responding to the insurer’s decision and knowing what to do when a claim is partly paid, delayed, or denied.
Step 23: Review the Claim Decision Carefully
When the insurer finishes reviewing your claim, do not look only at whether the result says:
Approved
or
Denied.
Read how the insurer reached the decision.
A claim can be:
- ✓Paid in full
- ✓Paid partly
- ✓Denied
- ✓Held while more information is requested
If the payment is lower than the amount you submitted, compare the decision with:
- ✓Amount claimed
- ✓Refunds or credits
- ✓Deductible
- ✓Benefit maximum
- ✓Per-item or per-day limits
- ✓Expenses the insurer considered ineligible
Understanding the calculation should come before assuming something went wrong.
What If the Claim Is Only Partly Approved?
A partial payment does not necessarily mean the insurer rejected the entire event.
Imagine you submitted:
$2,300
and received:
$1,650
The difference might result from:
- ✓Supplier refund
- ✓Deductible
- ✓Policy limit
- ✓Expense outside the applicable benefit
- ✓Per-item limit
- ✓Another coverage condition
Ask for an explanation if the calculation is not clear.
A useful question is:
“Can you show me how the approved payment was calculated and which claimed expenses were not reimbursed?”
Keep the response with your claim records.
Compare Each Unpaid Expense Separately
Do not treat every unpaid dollar as one dispute.
Make a table:
| Claimed Expense | Claimed | Approved | Difference |
|---|---|---|---|
| Hotel | $300 | $300 | $0 |
| Meals | $120 | $80 | $40 |
| Taxi | $70 | $0 | $70 |
| Flight | $700 | $500 | $200 |
Then find out why each difference occurred.
One expense may exceed a benefit limit.
Another may lack documentation.
Another may fall outside coverage.
That makes follow-up much easier.
Step 24: Read a Claim Denial From Beginning to End

A denied travel insurance claim can be frustrating, but the next step should be understanding the exact reason.
Look for:
- ✓Policy provision cited
- ✓Exclusion cited
- ✓Missing requirement
- ✓Missing evidence
- ✓Relevant dates
- ✓Instructions for requesting another review
NAIC’s March 2026 consumer guidance says state insurance departments can investigate issues including unfair claim denials or delays, failure to honor a policy, violations of state insurance laws, and lack of timely communication. It also recommends trying to resolve the issue with the insurer first.
Before escalating anything, understand what the insurer says is wrong with the claim.
Common Reasons a Travel Insurance Claim Can Be Denied
The reason will depend on the claim and policy, but possible issues include:
The Event Is Not Covered
For example, the reason for cancellation does not appear among the policy’s covered reasons.
An Exclusion Applies
The event may fall within a stated exclusion.
The Expense Does Not Qualify
An expense may be related to the travel problem but still fall outside the applicable benefit.
Documentation Is Missing
The insurer may not have enough evidence to verify the event or financial loss.
A Benefit Limit Has Been Reached
The expense may exceed:
- ✓Per-person maximum
- ✓Per-item maximum
- ✓Daily limit
- ✓Overall benefit maximum
Another Payer Is Responsible First
This can arise when the travel benefit is secondary or excess.
A Policy Requirement Was Not Met
That could involve reporting, authorization, eligibility, or another condition written into the policy.
Travel insurance varies significantly by policy, including what is covered, excluded, and limited. NAIC’s current April 2026 travel-insurance guidance emphasizes reviewing those terms carefully.
A Denial for Missing Evidence Is Different From a Coverage Denial
This distinction matters.
Documentation Problem
Example:
The insurer needs an itemized medical bill.
You may be able to obtain and submit the missing document.
Coverage Problem
Example:
The policy expressly excludes the event involved.
Providing another copy of the same receipt may not change that issue.
Identify which problem you actually have before deciding what to do next.
Step 25: Ask for the Exact Policy Wording
If the denial explanation is vague, ask:
Which section of my policy supports this decision?
Then compare:
- ✓Denial letter
- ✓Policy benefit
- ✓Definitions
- ✓Exclusions
- ✓Limits
Do not rely only on marketing material or a short summary page.
The insurance contract is much more important when resolving a claim dispute.
NAIC notes that bundled travel products may contain both insurance and non-insurance services, and only the insurance portions are overseen by state insurance departments.
Step 26: Check Whether Additional Documentation Can Be Submitted
If the insurer says evidence is missing, ask exactly what would help complete the review.
For example:
“Do you need the doctor’s report or the itemized hospital bill?”
“Do you need written confirmation from the airline showing the reason for cancellation?”
“Do you need the supplier’s refund statement?”
Do not send random additional paperwork.
Try to solve the specific information gap.
Example: Medical Documentation Problem
Suppose you submitted:
- ✓Hospital receipt
- ✓Credit-card statement
but the insurer says it cannot determine what treatment was provided.
You may need to request:
- ✓Itemized medical bill
- ✓Medical report
- ✓Discharge record
from the healthcare provider.
The issue is not necessarily whether you paid.
The issue may be whether the insurer can verify that the expense meets the policy.
Example: Cancellation Documentation Problem
Suppose you canceled because of illness.
You provide:
- ✓Flight booking
- ✓Hotel booking
but no medical evidence.
The insurer may have evidence of the financial loss but not enough evidence of the cancellation reason.
That is why event evidence and loss evidence both matter.
Example: Baggage Documentation Problem
Suppose your checked bag disappears.
You provide photographs of the suitcase but no report from the airline.
The insurer may ask for evidence that the carrier was notified and how the airline handled the loss.
If the airline pays compensation later, that information may also affect the amount the travel policy considers.
Step 27: Request Reconsideration or Review According to the Insurer’s Process
If you believe the insurer made a mistake, check the denial notice, policy, or insurer instructions for any available reconsideration or claim-review process.
Your response should focus on the specific disagreement.
A clear request might contain:
- ✓Claim number
- ✓Date of decision
- ✓Expense or benefit disputed
- ✓Reason you believe review is appropriate
- ✓Relevant policy wording
- ✓New or previously overlooked evidence
Keep your tone factual.
The goal is to make the issue easy to review.
Do Not Resubmit the Entire Claim Without Explaining the Problem
If the insurer denied one part of your claim, sending the same 30 documents again with no explanation may not help.
Instead, identify:
What decision am I challenging?
Why?
What evidence supports my position?
That creates a much clearer review request.
Keep Your Review Request Short and Organized
A useful structure is:
Claim
Claim number and traveler.
Decision
What was denied or reduced.
Reason Given
The insurer’s stated reason.
Your Concern
Why you believe the decision should be reviewed.
Evidence
Documents supporting your position.
Avoid turning the request into a long description of the entire vacation.
Do Not Change the Facts During a Review
A request for reconsideration should strengthen the evidence, not change what happened.
Do not:
- ✓Rewrite the incident to fit coverage
- ✓Alter receipts
- ✓Change dates
- ✓Hide refunds
- ✓Create documents
If your original claim contained an honest mistake, correct it clearly.
For example:
“My original form listed June 18. The correct incident date was June 17. Attached is the airline notice confirming the date.”
Transparency is better than trying to make records appear consistent artificially.
Step 28: Follow Up on an Unusually Delayed Claim
Claims can require time for document review, but you should still keep track of progress.
If the insurer has not responded within the timeframe it communicated, contact the claims department.
Ask:
- ✓Is the claim still under review?
- ✓Is any information missing?
- ✓Is there an expected next step?
- ✓Has an examiner been assigned?
Keep notes of the answer.
NAIC says state departments of insurance may investigate unfair claim delays and lack of timely communication when consumers cannot resolve the issue with the insurer.
Keep a Claim Follow-Up Log
For example:
| Date | Status |
|---|---|
| August 1 | Claim submitted |
| August 5 | Receipt confirmed |
| August 11 | Additional document requested |
| August 12 | Document uploaded |
| August 20 | Follow-up sent |
You do not need to contact the insurer constantly.
You simply need a reliable record of what happened.
Step 29: Know When a State Insurance Department May Help
For insurance policies issued in the United States, state departments of insurance regulate insurance companies and assist consumers with insurance complaints.
NAIC says consumers should generally try to resolve the problem with the insurer first. If the issue remains unresolved, a state DOI can investigate complaints involving matters such as unfair denials or delays, failure to honor a policy, violations of state insurance laws, or lack of timely communication.
NAIC provides a directory for locating the appropriate state insurance department.
A State Insurance Complaint Is Not the Same as Filing Another Claim
A regulator complaint is not simply:
“Please pay my travel insurance claim.”
It gives the regulator information about a possible insurance problem and allows it to review matters within its authority.
Before filing, organize:
- ✓Policy
- ✓Claim number
- ✓Claim submission
- ✓Insurer decision
- ✓Relevant correspondence
- ✓Supporting documents
- ✓Your explanation of the unresolved issue
NAIC specifically identifies delays, denials, and unsatisfactory settlements among common reasons consumers submit insurance complaints.
Check Whether the Product Is Actually Insurance
This can matter with travel products.
NAIC’s current travel-insurance guidance explains that travel packages can bundle insurance with non-insurance products such as cancellation fee waivers or travel assistance services. State insurance departments oversee the insurance portions, while non-insurance products are different.
So before filing an insurance complaint, identify whether your dispute concerns:
- ✓Travel insurance
- ✓Cancellation waiver
- ✓Travel assistance service
- ✓Airline or hotel refund
- ✓Another product
They may have different complaint routes.
Step 30: Keep the Claim File After Payment
Once the claim is resolved, do not immediately delete everything.
Keep:
- ✓Claim form
- ✓Supporting documents
- ✓Final decision
- ✓Payment explanation
- ✓Correspondence
at least until you are comfortable that the matter is fully complete.
This is particularly useful if:
- ✓Payment amount is questioned
- ✓Supplier later sends another refund
- ✓Another insurer responds
- ✓You need to refer back to the claim
What If Another Refund Arrives After the Claim Is Paid?
Contact the insurer if the new reimbursement relates to the same loss.
For example:
Travel insurer pays your eligible claim.
Later, an airline also refunds part of the same fare.
Do not assume you should keep duplicate reimbursement without telling anyone.
Explain what happened and let the insurer determine whether an adjustment is needed under the policy.
Build a Better Claim File Before Your Next Trip
A claim often teaches you which records are difficult to find.
Afterward, I would improve my normal travel-document system.
Before the next trip, save:
- ✓Insurance certificate
- ✓Full policy
- ✓Claim instructions
- ✓Emergency assistance number
- ✓Important bookings
- ✓Basic payment records
That reduces the amount of searching needed when something goes wrong.
Common Travel Insurance Claim Mistakes
Mistake 1: Waiting Until You Get Home to Collect Evidence
Reports and receipts can be much harder to obtain later.
Mistake 2: Saving the Receipt but Not Proof of What Happened
A receipt shows spending.
It may not prove the covered event.
Mistake 3: Not Reporting Lost Baggage to the Airline
The insurer may need a carrier report.
Mistake 4: Not Getting Medical Documentation
A card payment alone may not explain the medical treatment.
Mistake 5: Hiding Refunds or Credits
Disclose reimbursements accurately.
Mistake 6: Claiming the Full Trip Cost Instead of the Actual Loss
Calculate the remaining unrecovered amount.
Mistake 7: Missing Claim Deadlines
Use the deadline in your own policy.
Mistake 8: Ignoring Requests for Additional Evidence
Respond to the actual request.
Mistake 9: Losing Track of What Was Submitted
Keep copies and submission dates.
Mistake 10: Assuming a Denial Cannot Be Reviewed
Read the decision and check the insurer’s available review process.
Mistake 11: Arguing Before Understanding Why the Claim Was Reduced
First check limits, deductibles, and refunds.
Mistake 12: Treating a Complaint as the First Step
NAIC recommends attempting to resolve an insurance problem with the insurer before contacting the state insurance department.
For the wider mistakes travelers make before buying and while using travel insurance, see Travel Insurance Mistakes to Avoid Before and During Your Trip.
My Step-by-Step Travel Insurance Claim Process
Here is the complete process I would follow.
Before the Formal Claim
- ✓Protect health and safety.
- ✓Report the incident to the appropriate organization.
- ✓Check the relevant policy benefit.
- ✓Contact the insurer when required.
- ✓Save the claim number.
- ✓Collect evidence of what happened.
- ✓Collect receipts and financial evidence.
- ✓Record refunds and credits.
- ✓Keep a short timeline.
When Submitting
- ✓Complete the claim form accurately.
- ✓Calculate the remaining financial loss.
- ✓Organize documents.
- ✓Make sure scans are readable.
- ✓Submit within the required deadline.
- ✓Save proof of submission.
During Review
- ✓Track the claim.
- ✓Respond to document requests.
- ✓Keep copies of additional submissions.
- ✓Update the insurer about new refunds.
- ✓Keep a communication log.
After the Decision
- ✓Review the calculation.
- ✓Identify why anything was unpaid.
- ✓Provide missing documentation where appropriate.
- ✓Use the insurer’s review process if you believe a decision needs reconsideration.
- ✓Consider the appropriate state insurance department for an unresolved U.S. insurance complaint where applicable.
Final Travel Insurance Claim Checklist
Immediately After the Event
- ✓Health and safety addressed
- ✓Relevant provider notified
- ✓Insurer contacted where required
- ✓Claim number saved
- ✓Incident date recorded
Event Evidence
- ✓Medical report collected where relevant
- ✓Airline notice saved
- ✓Baggage report obtained
- ✓Police or incident report obtained where required
- ✓Relevant photographs saved
Financial Evidence
- ✓Itemized receipts saved
- ✓Proof of payment saved
- ✓Original bookings saved
- ✓Supplier cancellation terms saved
- ✓Refunds recorded
- ✓Travel credits recorded
Medical Claims
- ✓Medical report
- ✓Itemized bill
- ✓Prescription receipts where relevant
- ✓Proof of payment
- ✓Other insurer EOB or decision where required
Cancellation or Interruption Claims
- ✓Original itinerary
- ✓Proof of covered event
- ✓Non-refundable bookings
- ✓Supplier refunds
- ✓Remaining loss calculated
Baggage Claims
- ✓Carrier report
- ✓Baggage tag
- ✓Proof of ownership
- ✓Airline settlement
- ✓Replacement-item receipts where relevant
Delay Claims
- ✓Delay reason documented
- ✓Length of delay documented
- ✓Original itinerary
- ✓Replacement itinerary
- ✓Eligible expense receipts
Before Submission
- ✓Claim form checked
- ✓Dates match
- ✓Names match
- ✓Claimed amount calculated
- ✓Refunds disclosed
- ✓Files readable
- ✓Copies saved
- ✓Deadline checked
During Review
- ✓Submission confirmation saved
- ✓Claim status tracked
- ✓Additional requests answered
- ✓New documents logged
- ✓New refunds reported
After Decision
- ✓Payment calculation checked
- ✓Unpaid expenses identified
- ✓Denial reason read
- ✓Policy provision checked
- ✓Additional evidence considered
- ✓Review process checked where necessary
- ✓Final decision saved
Frequently Asked Questions
Report the travel problem, identify the relevant policy benefit, contact the insurer when required, collect evidence and receipts, complete the claim form, disclose refunds or credits, and submit the required documents before your policy’s deadline.
Contact it as soon as the policy requires, especially for medical emergencies, evacuation, major travel disruptions, or other situations where authorization or assistance may be important.
The formal claim may sometimes be completed later, but you should start collecting evidence during the trip. Medical records, carrier reports, police reports, and receipts can be much harder to obtain after leaving the destination.
It depends on the claim. Common examples include receipts, invoices, proof of payment, medical reports, airline notices, baggage reports, police or incident reports, booking confirmations, and evidence of refunds.
Receipts are commonly important because they show the amount spent, but you may also need evidence explaining why the expense occurred.
It depends on the insurer, policy, expense, and other evidence available. Contact the insurer and ask what alternative proof it will accept rather than creating replacement documentation yourself.
Many baggage or theft claims can require an appropriate police or incident report. Follow your policy’s reporting requirements and obtain official documentation where possible.
Report the missing baggage to the airline promptly, keep the baggage report and baggage tag, save carrier correspondence, and keep receipts for any expenses you may later claim under your policy.
You may need medical reports, itemized bills, receipts, proof of payment, prescriptions, and information from another health insurer where the travel benefit is secondary.
An Explanation of Benefits is a statement from a health insurer showing how it handled a medical claim, including amounts billed, paid, or left unpaid. It can be relevant when travel medical insurance is secondary.
You generally need evidence showing why the trip was canceled and evidence showing the prepaid financial loss after supplier refunds or credits.
Yes. Disclose refunds, credits, or other reimbursements related to the loss so the insurer can calculate the remaining eligible amount.
You should not represent an already-refunded amount as an unrecovered loss. Keep the refund documentation and let the insurer calculate any remaining eligible claim.
Start with the eligible expense and subtract refunds, credits, or other reimbursements affecting that same loss. Submit the accurate figures and let the insurer apply policy limits, deductibles, and coverage terms.
There is no universal processing time. It can depend on the insurer, claim type, complexity, and whether all required documentation has been provided. Track the claim using the insurer’s stated process and follow up if needed.
The insurer may need additional evidence to verify the event, expense, other reimbursement, or policy requirement. A request for more information does not by itself mean the claim has been denied.
Tell the insurer what you tried to obtain and ask whether alternative evidence can be accepted. Do not create or alter documentation.
Compare the payment with your claimed expenses and check whether deductibles, benefit limits, refunds, exclusions, or ineligible expenses explain the difference. Ask the insurer for a calculation if it is unclear.
Possible reasons include an uncovered event, exclusion, missing documentation, exceeded benefit limit, unmet policy condition, or another applicable issue. The exact reason should be stated by the insurer and checked against the policy.
Check the insurer’s denial notice, policy, or claim procedures for any available reconsideration or review process. Focus your request on the specific decision, policy wording, and relevant supporting evidence.
Check the claim status and ask whether information is missing. For U.S. insurance policies, NAIC says state insurance departments can investigate unfair claim delays or lack of timely communication after consumers have tried to resolve the matter with the insurer.
NAIC provides a directory of state insurance departments, which can handle complaints involving insurance companies within their authority.
Not necessarily. NAIC explains that travel packages can contain insurance and non-insurance products, and only the insurance products are subject to state insurance-department oversight.
It is better to keep the claim form, evidence, correspondence, and final decision until you are satisfied that the claim and any related reimbursements are fully resolved.
Final Thoughts
In short, a strong travel insurance claim is usually built from simple habits: report the problem promptly, document what happened, save proof of every financial loss and refund, follow the policy’s claim instructions, and keep everything organized until the claim is fully resolved.

Adnan Ahmed
RoamPlans AuthorTravel Planning Researcher & Editor
Adnan Ahmed is the travel planning researcher and editor behind RoamPlans. He creates clear, practical guides to help travelers compare destinations, plan routes, estimate costs, and avoid common trip-planning mistakes. His work combines careful source research, official travel information, and regular content reviews to keep each guide useful and current.
- ✓Destination Research
- ✓Budget Planning
- ✓Route Planning
- ✓Beginner Travel Guides



Turn This Guide into a Practical Trip Plan
Use the recommended Airline Baggage Allowance Checker or explore more free RoamPlans tools.