Step-by-Step Trip Planning Process: Plan Your Trip from Start to Finish
A clear 12-step workflow that takes you from the first destination idea to bookings, packing, documents, and your final pre-departure check.
Planning a trip can quickly become confusing when you try to do everything ↗ at once.
You start looking at flights. Then you open hotel websites. A few minutes later, you are checking places to visit, watching travel videos, and comparing train tickets. By the end of the day, you may have 20 browser tabs open but still have no clear travel plan.
I have found that trip planning becomes much easier when you follow the same process in the right order.
You do not need to book everything on the first day. You also do not need to research every restaurant, attraction, and local street before buying a flight.
The better approach is to complete one planning stage at a time.
In this guide, I will walk you through a simple step-by-step trip planning process that takes you from the first destination idea to your final pre-departure check.
You can use this process for a weekend vacation, an international holiday, a family trip, or a multi-week adventure.
If you need a wider look at every part of planning a vacation, start with our Ultimate Travel Planning Guide ↗. This guide is different. Here, we focus on the exact order in which you should plan your trip.
Why Following a Trip Planning Process Saves Time and Money?
There is no single perfect way to travel, but the order in which you make planning decisions matters.
For example, booking a hotel before deciding which areas you want to explore may leave you far from your main activities.
Buying a flight before checking visa rules can create a much bigger problem.
Creating a daily itinerary before researching local transportation may result in unrealistic plans.
A clear trip planning workflow helps you make one decision based on the information you already have.
It can help you:
- ✓Avoid booking mistakes
- ✓Compare travel costs more clearly
- ✓Keep important tasks organized
- ✓Reduce last-minute stress
- ✓Build a realistic itinerary
- ✓Avoid forgetting documents
- ✓Control your travel budget
Think of each planning step as the base for the next decision.
You choose the destination before setting a detailed daily budget.
You confirm travel dates before booking flights.
You understand your route before choosing all your hotels.
You research transportation before filling every day with activities.
Following this order keeps the planning process simple.
Trip Planning Process at a Glance
Before we go through each stage, here is the full process.
| Step | Planning Task | Main Goal |
|---|---|---|
| 1 | Choose your destination | Decide where you want to go |
| 2 | Set a starting budget | Know what you can afford |
| 3 | Choose travel dates | Create a clear travel window |
| 4 | Check entry requirements | Confirm you can enter the destination |
| 5 | Book transportation to the destination | Secure your main route |
| 6 | Book accommodation | Choose where you will stay |
| 7 | Plan local transportation | Learn how you will get around |
| 8 | Build your itinerary | Organize activities by day |
| 9 | Review travel insurance | Prepare for unexpected problems |
| 10 | Create a packing list | Pack for the actual trip |
| 11 | Organize travel documents | Keep important information together |
| 12 | Complete the final check | Confirm everything before leaving |
You may need to adjust the order slightly for some trips.
For example, a popular festival may require you to check hotel availability before confirming your final dates. A visa application may also require a basic flight or accommodation plan.
However, for most vacations, this 12-step process gives you a clear starting point.
Step 1: Choose Your Destination

The first step is deciding where you actually want to go.
This sounds simple, but destination choice affects almost every other planning decision.
Your destination affects:
- ✓Flight costs
- ✓Daily expenses
- ✓Visa requirements
- ✓Weather
- ✓Trip length
- ✓Transportation
- ✓Packing
- ✓Accommodation prices
Do not choose a destination based on one beautiful photo or short social media video.
Start with your travel goals.
Ask yourself:
- ✓What type of trip do I want?
- ✓How much time do I have?
- ✓Who am I traveling with?
- ✓What weather do I prefer?
- ✓Do I want a busy or relaxing trip?
- ✓Am I comfortable with long flights?
- ✓How much can I realistically spend?
Match the Destination to the Trip
Different destinations suit different travel goals.
| Travel Goal | Destination Type to Research |
|---|---|
| Relaxation | Beaches, islands, resorts |
| City experience | Major cities and cultural centers |
| Nature | National parks, mountains, countryside |
| Food | Cities and regions known for local cuisine |
| Road trip | Countries or regions with practical driving routes |
| Budget trip | Destinations with lower daily costs |
| Short vacation | Places with simple transport and shorter travel times |
Suppose you have five days available.
A destination that takes 15 hours to reach each way may use too much of your limited vacation time.
If you have three weeks, a longer international trip may make more sense.
This is why destination choice should come before detailed booking.
Create a Shortlist
If you cannot decide where to go, create a list of three to five destinations.
Compare them based on:
- ✓Estimated flight cost
- ✓Average daily cost
- ✓Travel time
- ✓Weather
- ✓Entry rules
- ✓Main activities
- ✓Transportation
You can use a simple comparison table.
| Factor | Destination A | Destination B | Destination C |
|---|---|---|---|
| Flight Cost | |||
| Daily Cost | |||
| Travel Time | |||
| Weather | |||
| Visa Needed | |||
| Main Activities |
You do not need hours of research at this stage.
Your goal is to remove options that clearly do not fit your trip.
For a deeper decision process, our How to Choose a Travel Destination guide ↗ will help you compare destinations based on budget, time, weather, and travel style.
What Happens If You Skip This Step?
You may choose a destination that does not match your budget, available time, or travel goals.
That can force you to change plans later after you have already spent money.
Step 2: Set a Starting Travel Budget
Once you have a destination in mind, decide how much you can comfortably spend.
At this stage, you do not need to calculate the exact cost of every meal and bus ticket.
You need a starting budget.
Your budget gives you boundaries for the rest of the planning process.
Start with one question:
What is the maximum amount I can spend on this trip without causing financial stress after I return home?
Be honest with your answer.
A vacation should not leave you worried about bills for months.
Divide Your Budget Into Main Costs
Break your estimated budget into basic groups.
| Budget Category | What It Includes |
|---|---|
| Main Transportation | Flights, trains, long-distance buses |
| Accommodation | Hotels, apartments, hostels |
| Local Transportation | Metro, taxis, rental cars |
| Food | Restaurants, cafés, groceries |
| Activities | Tours, tickets, attractions |
| Insurance | Travel protection |
| Personal Spending | Shopping and souvenirs |
| Emergency Money | Unexpected costs |
This gives you a basic picture of where your money may go.
For example, if your total budget is $3,000 and flights cost $1,800, you need to ask whether the remaining $1,200 can realistically cover the rest of the trip.
If the answer is no, you have several choices:
- ✓Change the destination
- ✓Change your travel dates
- ✓Shorten the trip
- ✓Save more money
- ✓Reduce accommodation costs
Making this decision now is much easier than discovering the problem halfway through your vacation.
Add Emergency Money
I prefer to keep emergency money separate from normal daily spending.
A simple starting point is around 10% to 15% of the expected trip cost.
This money may help with:
- ✓Missed transportation
- ✓Unexpected hotel changes
- ✓Medical needs
- ✓Lost items
- ✓Emergency purchases
Do not treat your emergency fund as extra shopping money.
What Happens If You Skip This Step?
You may book expensive flights or hotels before realizing that you do not have enough money for food, transportation, and activities.
Our Budget Travel Guide ↗ and How to Create a Travel Budget ↗ article will cover travel money planning in greater detail.
Step 3: Choose Your Travel Dates
Now you have a destination and a starting budget.
The next step is choosing your travel window.
Do not book a flight yet.
First, check whether your preferred dates make sense for the destination.
Travel dates can affect:
- ✓Weather
- ✓Flight prices
- ✓Hotel prices
- ✓Crowds
- ✓Festivals
- ✓Seasonal attractions
- ✓Transportation schedules
Check the Travel Season
Most destinations have peak, shoulder, and off seasons.
| Travel Season | Common Experience |
|---|---|
| Peak Season | Higher demand, larger crowds, higher prices |
| Shoulder Season | Moderate crowds and often better value |
| Off Season | Lower demand but possible weather or activity limits |
The cheapest month is not always the best month for your trip.
For example, low prices may be caused by heavy rain, extreme temperatures, or seasonal closures.
Research why prices are lower before booking.
Check Events and Holidays
A major festival can make a destination more exciting.
It can also make hotels expensive and crowded.
Check:
- ✓National holidays
- ✓School breaks
- ✓Major festivals
- ✓Sporting events
- ✓Religious events
- ✓Local celebrations
If you want to attend an event, higher prices may be worth it.
If the event does not interest you, moving your dates may save money.
Give Yourself a Date Range
If possible, avoid choosing one fixed departure date too early.
Instead of saying:
“I must leave on June 10.”
Try:
“I can travel between June 7 and June 15.”
A flexible travel window gives you more flight and accommodation options.
What Happens If You Skip This Step?
You may arrive during poor weather, face unexpected crowds, or pay much more because of a major event you did not know about.
Step 4: Check Passport, Visa, and Entry Requirements
This step comes before booking your main transportation for a reason.
You need to confirm that you can enter the destination.
Start with official government, embassy, consulate, or immigration sources whenever possible.
Entry rules can change, so do not rely only on an old blog post or social media video.
Check Your Passport
Look at:
- ✓Passport expiration date
- ✓Required remaining validity
- ✓Available blank pages
- ✓Passport condition
Some destinations require a passport to remain valid for a set period beyond the date of entry or departure.
The exact rule depends on the destination and the traveler’s nationality.
Check Visa Requirements
Find out whether you need:
- ✓A tourist visa
- ✓eVisa
- ✓Electronic travel authorization
- ✓Visa on arrival
- ✓No visa for a limited stay
Also check the expected processing time.
Do not assume that a visa can be approved in a few days.
Review Other Entry Rules
Depending on the destination, you may need:
- ✓Proof of onward travel
- ✓Return flight details
- ✓Accommodation information
- ✓Travel insurance
- ✓Health documents
- ✓Vaccination certificates
- ✓Entry forms
- ✓Proof of funds
Requirements can vary based on your passport and travel route.
Save the Official Information
When I research entry requirements, I recommend saving the official page and checking it again closer to departure.
You can also add a reminder to your travel calendar.
| Check | Status |
|---|---|
| Passport valid | □ |
| Visa checked | □ |
| Entry authorization checked | □ |
| Health requirements checked | □ |
| Onward travel rules checked | □ |
| Official source saved | □ |
What Happens If You Skip This Step?
You may pay for non-refundable flights or hotels before discovering a passport or visa problem.
In serious cases, you could be refused boarding or entry.
Our Complete Travel Documents Guide will cover passports, visas, and travel paperwork in greater detail.
Quick Review: Your First Four Planning Steps
Before moving to booking, you should now know four things.
- ✓Where you are going
- ✓How much you can spend
- ✓When you want to travel
- ✓Whether you meet the main entry requirements
If one of these is still unclear, stop and resolve it before moving forward.
The next stage is where money starts leaving your account.
You will book your main transportation, choose accommodation, and work out how you will move around after arrival.
Taking a little extra time now can prevent expensive changes later.
Step 5: Book Your Main Transportation
You have chosen your destination, set a starting budget, picked your travel dates, and checked the main entry requirements.
Now you can start booking.
Your first major booking is usually the transportation that gets you to your destination.
Depending on the trip, this could be:
- ✓An international flight
- ✓A domestic flight
- ✓A train
- ✓A long-distance bus
- ✓A ferry
- ✓Your own car
For most international trips, this means booking a flight.
The goal at this stage is not to find the lowest number on a search page. Your goal is to choose a route that works with your budget, schedule, and trip plan.
Compare the Total Travel Cost
A cheap ticket can become expensive after extra fees are added.
Before booking, check:
- ✓Checked baggage fees
- ✓Carry-on rules
- ✓Seat selection costs
- ✓Payment fees
- ✓Airport transfer costs
- ✓Overnight layover costs
For example, one flight may cost $450 and another $520.
At first, the $450 ticket looks better.
But if the cheaper flight requires $80 for luggage and arrives at an airport that costs $50 to reach from the city, the total cost is now $580.
The $520 flight may actually be the better choice.
Compare the full cost, not just the advertised fare.
Check the Route Carefully
Look at the entire trip before confirming your booking.
Ask:
- ✓How many connections are there?
- ✓How long is each layover?
- ✓Do I need to change airports?
- ✓Does the trip require an overnight stop?
- ✓What time will I arrive?
- ✓Is transportation available after arrival?
Arrival time matters more than many travelers expect.
A flight arriving at 1:00 a.m. may save money, but you could face limited public transportation and an expensive taxi ride.
You may also need to pay for a hotel night that you barely use.
Check Airport Codes
Some cities have several airports.
Do not assume that every airport with a city name is close to the city center.
Before booking, check the airport’s location on a map.
Also confirm the exact airport for connecting flights.
A connection that requires changing airports can add extra time, cost, and stress.
Review the Booking Details
Before making payment, stop and check everything one final time.
| Booking Detail | What to Check |
|---|---|
| Passenger Name | Matches travel document |
| Departure Date | Correct day and month |
| Return Date | Correct day and month |
| Airport | Correct city and airport |
| Baggage | Enough for your trip |
| Layovers | Enough connection time |
| Fare Rules | Changes and cancellation |
| Arrival Time | Local transportation available |
Do not rush this final review.
Correcting a booking mistake can be expensive.
What Happens If You Skip This Step?
You may book a route with expensive extra fees, difficult connections, or arrival times that do not work with your accommodation and transportation plan.
For a deeper look at comparing fares, routes, and booking options, read our Flight Booking Guide.
Step 6: Choose and Book Your Accommodation
Once your main transportation is confirmed, you know your arrival and departure dates.
Now you can book accommodation.
The order matters.
Booking a hotel before confirming your travel dates can create problems if flight prices force you to change your schedule.
At this stage, start with location.
Decide Where You Need to Stay
Do not begin by searching for the cheapest hotel in the entire destination.
First, look at your basic trip route.
Ask:
- ✓Which areas do I want to visit?
- ✓Where is the main transportation hub?
- ✓Will I use public transportation?
- ✓Do I need to reach the airport early?
- ✓Am I staying in one city or several?
Your answers help narrow the search area.
For a city trip, staying near a metro or train station may save hours over the full vacation.
For a road trip, parking may matter more than access to public transportation.
For a beach vacation, walking distance to the beach may be your main priority.
Compare Location and Price Together
A lower room price does not always mean a lower trip cost.
Consider this example.
| Accommodation | Nightly Price | Daily Transport | 5-Night Estimated Cost |
|---|---|---|---|
| Hotel A | $90 | $30 | $600 |
| Hotel B | $110 | $5 | $575 |
Hotel A looks cheaper at first.
After adding daily transportation, Hotel B may cost less overall.
You also save travel time.
This is why accommodation should be compared as part of your full trip plan.
Read Recent Reviews
Do not judge a property only by its photos.
Read recent guest reviews and look for repeated comments about:
- ✓Cleanliness
- ✓Noise
- ✓Safety
- ✓Wi-Fi
- ✓Staff
- ✓Check-in
- ✓Transportation access
One negative review does not always mean the property is bad.
Look for patterns.
If many recent guests mention the same problem, take it seriously.
Check the Cancellation Policy
Plans can change.
Before booking, find out:
- ✓Is the reservation refundable?
- ✓What is the cancellation deadline?
- ✓Is prepayment required?
- ✓Are taxes included?
- ✓Are there resort or cleaning fees?
- ✓Is there a security deposit?
Save the booking confirmation after payment.
What Happens If You Skip This Step?
You may choose a cheap property in an inconvenient area, spend more on transportation, or discover unexpected fees after booking.
Our Accommodation Guide explains accommodation types and booking factors in more detail.
Step 7: Plan How You Will Get Around
You know how you are reaching the destination.
You also know where you are staying.
Now work out how you will move between places during the trip.
This step should come before building your detailed itinerary.
Why?
Because transportation affects how much you can realistically do in one day.
A place that looks close on a map may require two buses and 90 minutes of travel.
Start with Airport or Station Transportation
Your first local transportation question should be simple:
How will I get from my arrival point to my accommodation?
Research:
- ✓Airport trains
- ✓Airport buses
- ✓Taxis
- ✓Ride apps
- ✓Hotel transfers
- ✓Rental cars
Check the operating hours.
If you arrive late at night, your normal transportation option may no longer be available.
Save the route before departure.
Learn the Main Local Transportation System
Next, find out how people normally move around the destination.
| Transportation Type | Often Useful For |
|---|---|
| Metro | Large cities |
| Local Bus | Cities and smaller towns |
| Train | Travel between cities |
| Rental Car | Rural areas and road trips |
| Ferry | Islands and coastal routes |
| Taxi or Ride App | Short or late-night trips |
| Walking | Compact neighborhoods |
You do not need to learn every route before traveling.
You should know the basic system.
Find out:
- ✓How tickets are purchased
- ✓Whether cash is accepted
- ✓If a transport card is available
- ✓When services stop running
- ✓Whether advance reservations are needed
Check Long-Distance Transportation Early
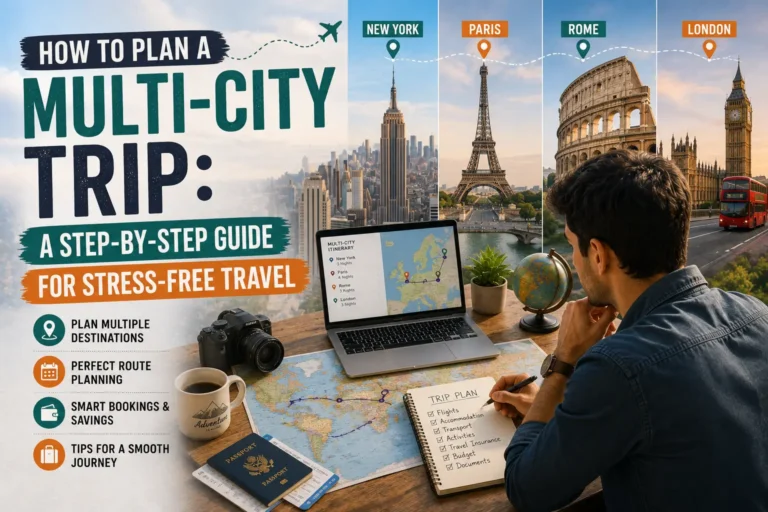
If your trip includes several cities, research travel between them before finalizing the itinerary.
Some trains, ferries, and buses may:
- ✓Run only on certain days
- ✓Require reservations
- ✓Sell out
- ✓Have seasonal schedules
This can affect the order of your trip.
For example, you may plan to visit City A, City B, and City C.
After checking transportation, you may discover that traveling from City A directly to City C is much easier.
Your route may work better as:
City A → City C → City B
This is exactly why transportation planning comes before the detailed daily schedule.
What Happens If You Skip This Step?
You may create an itinerary that looks good on paper but wastes hours on difficult routes and unnecessary travel.
For more help comparing trains, buses, rental cars, and local transit, use our Complete Transportation Guide.
Step 8: Build Your Travel Itinerary
You now have the information needed to build a realistic itinerary.
At this point, you know:
- ✓Your destination
- ✓Your budget
- ✓Your travel dates
- ✓Your main transportation
- ✓Where you are staying
- ✓How local transportation works
Now you can decide what to do each day.
List Your Priority Experiences
Start by making three lists.
Must Do
These are the experiences you would be disappointed to miss.
Would Like to Do
These are activities you want to enjoy if time allows.
Optional
These are backup ideas.
This simple system stops every attraction from feeling equally important.
For example:
| Priority | Activity |
|---|---|
| Must Do | Main museum |
| Must Do | Historic district |
| Would Like | Food market |
| Would Like | Local viewpoint |
| Optional | Shopping center |
| Optional | Second museum |
Start your itinerary with the Must Do list.
Group Activities by Location
One of the easiest ways to waste travel time is visiting opposite sides of a city on the same day.
Use a map to group nearby activities.
Instead of this:
Morning: North side
Lunch: South side
Afternoon: North side
Dinner: City center
Try:
Day 1: North side
Day 2: South side
Day 3: City center
This reduces transportation time and makes each day easier.
Check Opening Days and Times
Never assume an attraction is open every day.
Check:
- ✓Opening hours
- ✓Closing days
- ✓Last entry time
- ✓Reservation rules
- ✓Seasonal schedules
Museums and attractions may close on certain weekdays.
Popular places may require timed tickets.
Add these fixed activities to your itinerary first.
Then build flexible activities around them.
Add Travel Time
If a train journey takes two hours, that does not always mean you only lose two hours.
You may also need time to:
- ✓Check out
- ✓Reach the station
- ✓Wait for departure
- ✓Find your next accommodation
- ✓Check in
A two-hour train trip can use half a day.
Be realistic.
Leave Free Time
Do not fill every hour.
I prefer to leave space for:
- ✓Rest
- ✓Weather changes
- ✓Delays
- ✓Local recommendations
- ✓Unexpected discoveries
A simple day may look like this:
| Time | Plan |
|---|---|
| Morning | Main attraction |
| Lunch | Nearby restaurant |
| Afternoon | Two nearby activities |
| Late Afternoon | Free time |
| Evening | Dinner and flexible plans |
This gives your day structure without making it feel like a work schedule.
What Happens If You Skip This Step?
You may waste time deciding what to do each morning or create an unrealistic schedule that leaves you tired and frustrated.
For a beginner-focused approach, our How to Plan Your First Trip guide explains how to keep a first itinerary simple. Our future itinerary resources will provide more detailed planning templates.
Step 9: Review Your Travel Insurance Needs
Once your main bookings are in place, review your travel insurance needs.
Do not automatically buy the first policy offered during flight checkout.
First, understand what protection you may already have.
Check:
- ✓Existing health insurance
- ✓Credit card travel benefits
- ✓Airline protection
- ✓Accommodation cancellation terms
Then look for gaps.
Think About Your Trip Risks
Your insurance needs may change based on the trip.
Consider:
- ✓Destination
- ✓Trip cost
- ✓Medical costs at the destination
- ✓Planned activities
- ✓Number of travelers
- ✓Non-refundable bookings
A short domestic weekend trip may have different needs from a three-week international hiking vacation.
Review the Main Types of Coverage
Travel policies may include protection for:
- ✓Emergency medical care
- ✓Medical evacuation
- ✓Trip cancellation
- ✓Trip interruption
- ✓Travel delays
- ✓Lost or delayed baggage
Coverage limits and exclusions can vary.
Read the policy details before buying.
Check Planned Activities
This is especially important if your trip includes activities such as:
- ✓Hiking at higher altitudes
- ✓Skiing
- ✓Scuba diving
- ✓Adventure sports
- ✓Motorbike riding
Some standard policies may exclude certain activities.
Do not assume you are covered.
Save Your Policy Information
After buying a policy, save:
- ✓Policy number
- ✓Emergency phone number
- ✓Claim instructions
- ✓Coverage details
Keep this information somewhere you can access while traveling.
What Happens If You Skip This Step?
You may discover after a cancellation, medical problem, or lost bag that you do not have the protection you expected.
Our Complete Travel Insurance Guide explains coverage, exclusions, and policy comparison in greater detail.
Quick Review: Steps 5 to 9
You have now moved from research into active trip planning.
At this stage, you should have:
| Planning Task | Status |
|---|---|
| Main transportation booked | □ |
| Accommodation booked | □ |
| Arrival transportation researched | □ |
| Local transportation reviewed | □ |
| Main itinerary created | □ |
| Insurance needs reviewed | □ |
Notice the order.
You did not create your detailed itinerary before checking transportation.
You did not choose accommodation before knowing your travel dates.
You did not buy random travel insurance before reviewing your actual trip.
Each decision supports the next one.
That is the main idea behind a step-by-step trip planning process.
The final stage is preparation.
Next, you will create a packing list based on the real trip, organize your documents, complete your final checks, and use a simple planning timeline to make sure nothing is forgotten.
Step 10: Create a Packing List Based on Your Actual Trip
Packing should come after your main trip plan is clear.
This is another reason the order of planning matters.
You already know:
- ✓Where you are going
- ✓When you are traveling
- ✓How long you will stay
- ✓What the weather may be like
- ✓What activities you plan to do
- ✓How much baggage your ticket allows
Now you can create a packing list that matches the real trip.
Do not start with a generic list and pack every item you see online.
Start with your itinerary.
If your trip includes hiking, you may need suitable shoes and outdoor clothing.
If you are visiting a beach destination, swimwear and sun protection matter more.
If you plan to visit religious or cultural sites, you may need clothing that follows local dress expectations.
Divide Your Packing List Into Groups
A simple packing system makes the process easier.
Travel Documents
- ✓Passport
- ✓Visa documents
- ✓Boarding information
- ✓Accommodation details
- ✓Insurance information
- ✓Driver’s license if needed
Clothing
- ✓Daily clothing
- ✓Comfortable shoes
- ✓Sleepwear
- ✓Underwear
- ✓Weather-specific layers
Toiletries
- ✓Toothbrush
- ✓Toothpaste
- ✓Deodorant
- ✓Sunscreen
- ✓Personal care products
Electronics
- ✓Phone
- ✓Charging cables
- ✓Power bank
- ✓Travel adapter
- ✓Camera if needed
Health Items
- ✓Prescription medicine
- ✓Basic first aid supplies
- ✓Personal medical items
Check Your Baggage Rules Again
Before packing, review the baggage limits for your main transportation.
Check:
- ✓Carry-on size
- ✓Checked bag weight
- ✓Personal item rules
- ✓Restricted items
- ✓Liquid limits
Do not wait until airport check-in to discover that your bag is overweight.
Pack in Stages
I prefer a simple three-stage packing process.
Stage 1: Make the List
Write down everything you think you need.
Stage 2: Lay Items Out
Place the items where you can see them.
Stage 3: Remove Unnecessary Items
Ask yourself whether you will realistically use each item.
This final step often removes a surprising amount of extra clothing and gear.
What Happens If You Skip This Step?
You may overpack, forget items connected to planned activities, or face extra baggage fees.
For detailed lists and packing methods, read our Complete Travel Packing Guide.
Step 11: Organize Your Travel Documents and Booking Information
At this point, most of your trip is planned.
Now put all the important information in one place.
Do not leave flight details in one email account, hotel confirmations in an app, insurance information in a PDF you cannot find, and train tickets buried in screenshots.
Create one travel document system.
Create a Main Travel Folder
You can use:
- ✓A cloud storage folder
- ✓A travel planning app
- ✓A secure note system
- ✓A printed travel folder
Store copies of:
- ✓Passport details
- ✓Visa information
- ✓Flight bookings
- ✓Hotel confirmations
- ✓Train or ferry tickets
- ✓Travel insurance
- ✓Car rental information
- ✓Attraction reservations
Name files clearly.
For example:
Japan Flight Confirmation
Tokyo Hotel Booking
Kyoto Train Tickets
Travel Insurance Policy
Clear names are easier to find during a stressful situation.
Keep Important Information Offline
Internet access can fail.
Your phone battery can die.
An app can log you out.
Keep offline copies of the most important details.
This may include:
- ✓Hotel address
- ✓Arrival transportation route
- ✓Insurance emergency number
- ✓Passport copy
- ✓Main booking references
You do not need to print every restaurant reservation.
Focus on information that could create a serious problem if you cannot access it.
Share Your Main Travel Plan
For longer or international trips, share your basic itinerary with someone you trust.
Include:
- ✓Destination
- ✓Travel dates
- ✓Main accommodation
- ✓Major transportation details
- ✓Emergency contact information
This does not mean sending every hour of your itinerary.
A simple overview is enough.
What Happens If You Skip This Step?
You may waste time searching through emails and apps when you urgently need a booking number, address, or emergency contact.
Step 12: Complete Your Final Pre-Departure Check
The final step happens shortly before you leave.
At this stage, do not restart the entire planning process.
Your goal is to confirm that the plan you already made still works.
Recheck Your Main Bookings
Confirm:
- ✓Flight or train times
- ✓Departure airport or station
- ✓Accommodation dates
- ✓Airport transfer plan
- ✓Car rental details
- ✓Reserved attractions
Pay close attention to dates and times.
Travel bookings may use local time.
Check Current Conditions
A few days before departure, review:
- ✓Weather forecast
- ✓Transportation disruptions
- ✓Airport notices
- ✓Local events
- ✓Official travel advice
- ✓Entry requirements
Entry rules and local conditions can change.
Use current official sources where rules or safety information are involved.
Prepare Your Phone
Before leaving, download:
- ✓Offline maps
- ✓Airline apps
- ✓Hotel information
- ✓Transport apps
- ✓Translation tools if needed
- ✓Important travel documents
Also save important phone numbers.
Prepare Your Money
Check:
- ✓Payment cards
- ✓Local currency needs
- ✓Bank travel settings
- ✓Emergency payment option
Do not rely on one payment method.
Carrying a backup card separately can help if your main card is lost or blocked.
Complete the Final Checklist
The night before departure, review this list.
| Final Check | Done |
|---|---|
| Main transportation confirmed | □ |
| Accommodation confirmed | □ |
| Passport packed | □ |
| Visa checked | □ |
| Travel documents saved | □ |
| Insurance details saved | □ |
| Bags within limits | □ |
| Devices charged | □ |
| Offline maps downloaded | □ |
| Payment methods ready | □ |
| Arrival route saved | □ |
| Trusted contact has trip details | □ |
Once this is complete, stop planning.
Get some rest.
What Happens If You Skip This Step?
Small problems may appear on travel day that could have been fixed with a quick final review.
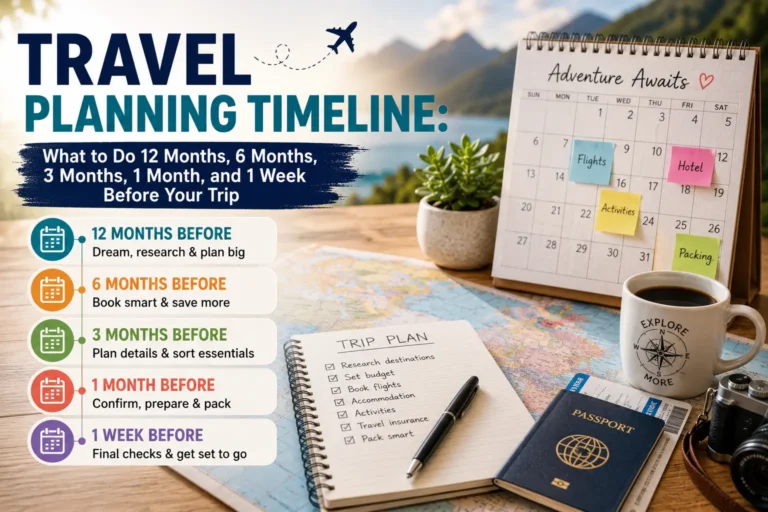
Complete Trip Planning Timeline
A planning process is easier to follow when you know roughly when to complete each stage.
The exact timing depends on the destination, but this general timeline works for many trips.
| Time Before Travel | Main Planning Tasks |
|---|---|
| 6–12 Months | Choose destination, review budget, check passport |
| 3–6 Months | Choose dates, review entry rules, compare main transportation |
| 2–4 Months | Book flights or main transport and accommodation |
| 1–2 Months | Plan local transportation, build itinerary, review insurance |
| 2–4 Weeks | Confirm reservations and create packing list |
| 1 Week | Organize documents, check weather, download travel tools |
| 1–2 Days | Confirm bookings, complete check-in, finish final review |
Do not treat this timeline as a strict rule.
Some popular destinations require earlier booking.
A short local trip may need far less time.
The purpose of the timeline is to help you work in stages instead of leaving every task until the final week.
For a more detailed schedule, use our Travel Planning Timeline guide.
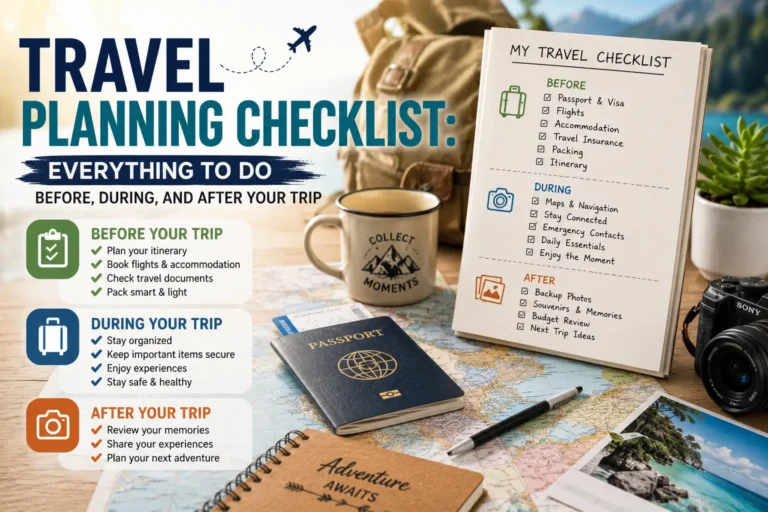
Printable Step-by-Step Trip Planning Checklist
Use this workflow from top to bottom.
Stage 1: Decide
- ✓Choose your destination.
- ✓Set a starting budget.
- ✓Choose your travel dates.
- ✓Check passport validity.
- ✓Check visa and entry requirements.
Stage 2: Book
- ✓Compare main transportation.
- ✓Book your flight, train, or other main route.
- ✓Choose your accommodation area.
- ✓Book accommodation.
- ✓Save booking confirmations.
Stage 3: Build the Trip
- ✓Research airport transportation.
- ✓Learn the local transport system.
- ✓Check travel between cities.
- ✓List priority activities.
- ✓Group activities by location.
- ✓Check attraction opening times.
- ✓Build a flexible itinerary.
Stage 4: Protect the Trip
- ✓Review existing insurance benefits.
- ✓Check your main trip risks.
- ✓Compare travel insurance if needed.
- ✓Save policy and emergency information.
Stage 5: Prepare
- ✓Create a packing list.
- ✓Check baggage limits.
- ✓Organize travel documents.
- ✓Download offline maps.
- ✓Save important booking details.
- ✓Prepare payment methods.
Stage 6: Final Check
- ✓Confirm departure time.
- ✓Confirm accommodation.
- ✓Check current entry requirements.
- ✓Review the weather.
- ✓Complete online check-in if available.
- ✓Charge devices.
- ✓Pack your passport.
- ✓Share your basic itinerary with a trusted contact.
Common Trip Planning Process Mistakes
A clear workflow helps, but travelers can still make mistakes by completing tasks in the wrong order.
Booking Before Checking Entry Requirements
A cheap flight is not a good deal if a passport or visa issue prevents you from traveling.
Check entry rules first.
Building an Itinerary Before Checking Transportation
A route may look easy on a map but take several hours by public transport.
Research transportation before assigning activities to days.
Choosing Accommodation Only by Price
Location affects transportation costs and daily travel time.
Compare the full trip impact, not only the nightly rate.
Packing Before the Itinerary Is Clear
Packing too early often leads to unnecessary items.
Wait until you know the weather and main activities.
Treating Every Activity as a Must-Do
Too many priority activities create a rushed schedule.
Choose the experiences that matter most.
Ignoring Booking Conditions
Refund rules, extra fees, and change policies can affect your trip later.
Read the booking details before paying.
Saving Everything in Different Places
Scattered documents are difficult to find during travel.
Use one main organization system.
Continuing to Plan Until Departure
At some point, planning must stop.
After the final check, trust the work you have already done.
How to Keep Your Trip Planning Process Simple?
The planning process does not need to become a second job.
Use these simple rules.
Make One Major Decision at a Time
Do not compare hotels while trying to choose between five countries.
Finish the destination decision first.
Keep One Planning List
Use one main checklist for unfinished tasks.
Avoid creating several different lists in different apps.
Set Planning Sessions
You do not need to plan the entire trip in one evening.
You could use separate sessions for:
- ✓Destination and dates
- ✓Budget
- ✓Booking
- ✓Transportation
- ✓Itinerary
- ✓Final preparation
Save Research You May Need Later
If you find useful information, save the link in the correct trip folder.
Do not trust yourself to find the same page again later.
Stop Researching When You Have Enough Information
There will always be another hotel, restaurant, or travel video to compare.
Once you have enough reliable information to make a good decision, move to the next step.
Frequently Asked Questions
The first step is choosing a destination that fits your budget, available time, travel interests, and comfort level.
A practical order is destination, budget, dates, entry requirements, main transportation, accommodation, local transportation, itinerary, insurance, packing, documents, and final checks.
You should at least know your general spending limit. You can then compare destinations and create a more detailed budget after choosing one.
For many trips, it makes sense to confirm travel dates and main transportation first. You can then book accommodation around your confirmed arrival and departure schedule.
Create your detailed itinerary after researching accommodation location and local transportation. This helps you build more realistic days.
Many international trips benefit from three to six months of planning. Visa processing, popular travel seasons, or special events may require an earlier start.
No. Plan your priority experiences and important reservations, but leave some flexible time.
Create your final packing list after the main itinerary and weather needs are clear. Many travelers begin physical packing one or two weeks before departure.
Keep your passport information, visa details, main transport bookings, accommodation confirmations, insurance information, and important reservations organized.
Insurance timing depends on the policy and the type of coverage you need. Review your insurance needs once major trip costs and planned activities are clear, and read policy terms carefully.
One of the biggest mistakes is booking major parts of a trip before checking whether the destination, budget, dates, and entry requirements actually work together.
Your main bookings should be confirmed, local transportation understood, priority activities organized, documents prepared, packing completed, and final checks finished. After that, allow some flexibility.
Final Thoughts
A good trip planning process is less about doing more research and more about making decisions in the right order.
Start with the big questions.
Where are you going?
How much can you spend?
When can you travel?
Can you meet the entry requirements?
Once those decisions are clear, booking becomes easier.
After booking, you can work on transportation and your itinerary.
Then you move into insurance, packing, documents, and final preparation.
The process is simple:
Decide. Book. Build. Protect. Prepare. Check.
You do not need to plan a perfect trip.
You need a clear plan that covers the important details and leaves enough flexibility for real travel.
For a broader look at every part of travel preparation, read our Ultimate Travel Planning Guide. If this is your first time organizing a vacation, our How to Plan Your First Trip guide provides extra beginner-focused advice.
Then continue through the RoamPlans travel planning guides whenever you need deeper help with budgets, checklists, timelines, flights, accommodation, packing, transportation, or destination planning.

Adnan Ahmed
RoamPlans AuthorTravel Planning Researcher & Editor
Adnan Ahmed is the travel planning researcher and editor behind RoamPlans. He creates clear, practical guides to help travelers compare destinations, plan routes, estimate costs, and avoid common trip-planning mistakes. His work combines careful source research, official travel information, and regular content reviews to keep each guide useful and current.
- ✓Destination Research
- ✓Budget Planning
- ✓Route Planning
- ✓Beginner Travel Guides